
The great thing about Easter decorations is that they are so plentiful and affordable. Take plastic Easter eggs, for instance. You can arrange them in a bowl or basket, stack them in a clear vase, scatter them through a display, stick them on a floral pick, or even hang them from windows, light fixtures, etc. They also come in a variety of colors and designs, cost very little, and can be re-used again. (And not just for Easter! See our Space Invaders party for an alien nest using Easter eggs, Easter grass, and LED lights.)
I first saw the idea for a plastic Easter egg garland at “How to Make Your Easter Celebration Extra Special for the Kids”, a blog post on Babble sponsored by Party City with great tips for cost-effective decorations. It was too cute; I just had to try it! I added a little extra to make it my own, which is some leftover green yarn made into pompoms as imitation Easter grass between the eggs. YAS!
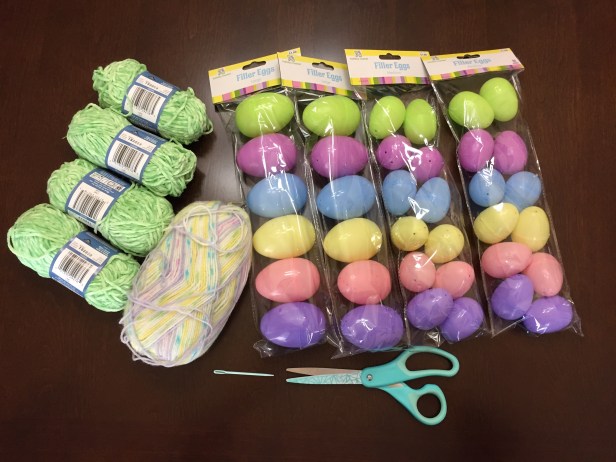
Here are the supplies I used:
- Easter eggs in different colors and sizes
- Yarn for stringing the eggs (you can also use thread or very thin ribbon)
- Yarn for pompoms
- Scissors
- Tapestry needle (for threading the pompoms)
- Tape (for giving your main yarn a hard end for threading through the eggs)
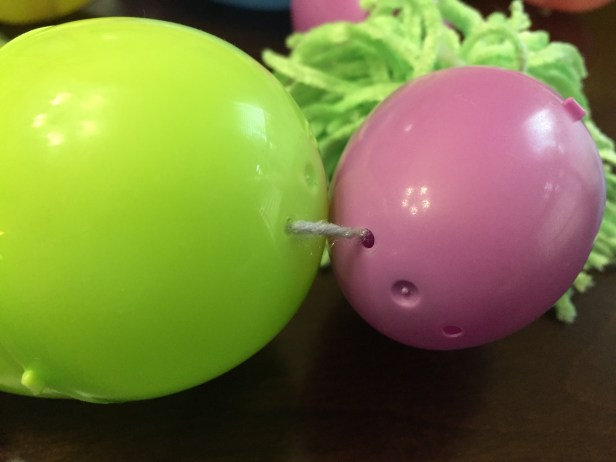
1) Plastic Easter eggs have holes at both ends, making them easy to string. I used yarn because it was colorful, soft, and strong enough to hold the weight of the decorations. The challenge, though, is the fraying end of the yarn. I wrapped the end in a small piece of tape to give me a solid tip, a lot like the end of a shoe lace. It worked great for stringing the eggs!
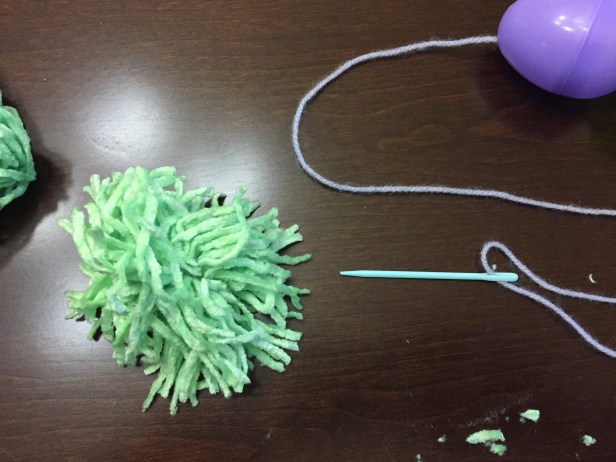
2) I made the pompoms myself (first time was a sad effort but it got better). If you haven’t tried this yet, WOO, don’t worry! You can search the web for “make pompoms” and get a lot of returns for YouTube videos… or just watch this handy video: How to Make Pompoms. Because these pompoms were meant to imitate grass, I left them messy and shaggy instead of trimming them, which worked well for this garland. To string them onto the garland, I used the tapestry needle to get the other yarn through the middle of the pompom. You can try using a regular needle, but my yarn would only fit through the tapestry needle (and, hey, I didn’t accidentally poke myself!).
TIP: You don’t have to use pompoms if you don’t have thread handy. This garland would work just as well with tissue paper flowers, ribbon tied into bows, etc. Or just leave it as the eggs for a minimalist statement!
And that’s it! I know, you expected more, right? Nope, it was super easy and it took more time making the pompoms than actually stringing the garland. Here is the final product:
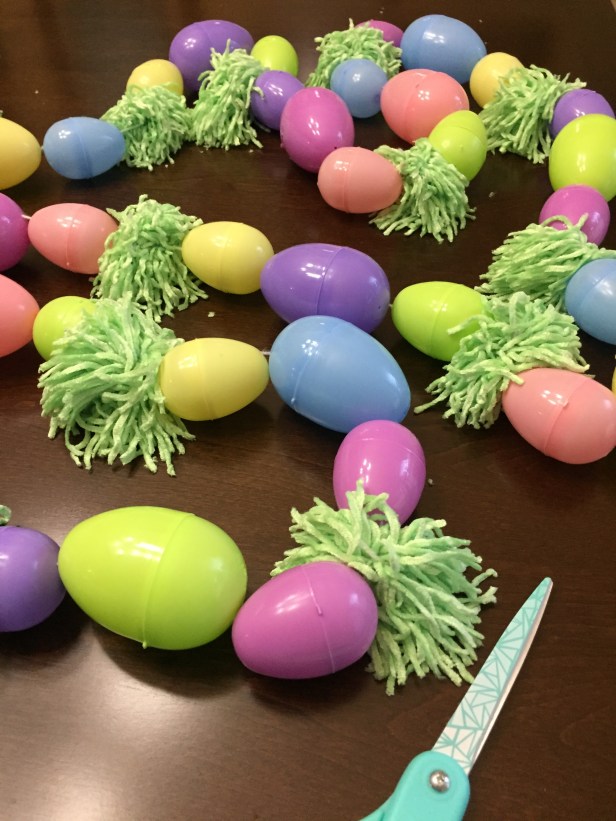
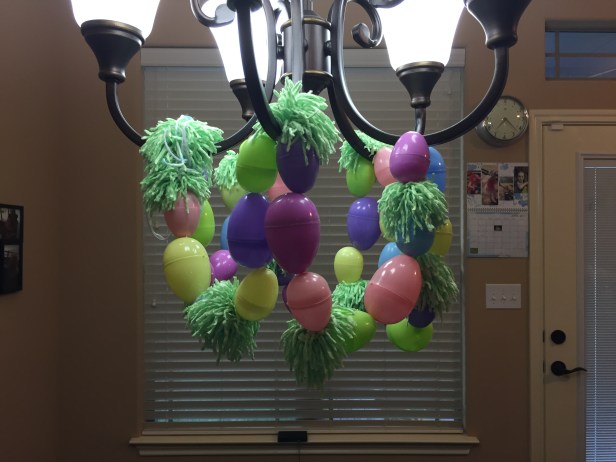
I think the shaggy green pompoms might be my favorite. They’re so cute, I’d pinch their cheeks if they had them. And here is the full garland hanging on my dining room light:
If you make these and add your own custom touch, we’d love to hear about it! Just post to our Facebook page with your pics, and we will be ready to ooo and aahh. Happy crafting!
