I love fruit trays for parties for multiple reasons: a) they’re sweet, b) both kids and adults like fruit, c) there’s a wide variety of fruit flavors and colors, and c) they can be affordable if you make your own. Win-win-win-WIN. The only drawbacks are that it takes effort and you have to wait until right before the event so the fruit is fresh. Still worth it, in my opinion!
TIP: Looking for something smaller and more pastel? Check out our DIY Spring Fruit Tray.
This particular fruit tray was made for an elementary school party, which means it had to be fun, kid-friendly, and easy to transport. The best theme for this? Rainbow fruit tray with marshmallow clouds!
Supplies
I gave ranges on the supplies below depending on what size of fruit tray(s) you wanted to make. To do something smaller such as one tray for 5-12 people, use the first number indicated for each supply. To go bigger with two trays for 15-25 people, use the second number for each supply.
- Disposable Metal Pans
- 1-2 “medium rack roaster pans”, which are the extra large and deep pans, for the outer layer to hold it all together
- 3-6 “medium loaf pans”, which are the small but deep pans, for the inner layer to hold the fruit
- 1-2 bags of marshmallows (preferably regular sized, not mini)
- 3-6 varieties of fruit in different colors
- Red (strawberries, watermelon, raspberries, cherries, red apple slices, red grapes)
- Orange (cantaloupe, oranges, apricots, peaches, papaya)
- Yellow (pineapple, banana, mango)
- Green (green apple slices, green grapes, honeydew melon, kiwis)
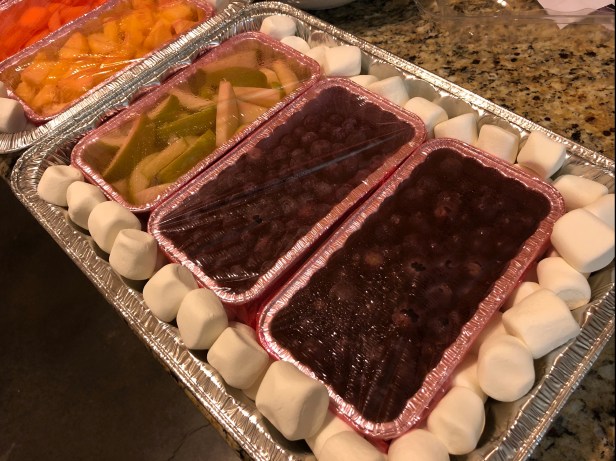
- Blue (blueberries)
- Purple (black grapes, blackberries, plums)
TIP: If you have a hard time finding specific colors of fruit, you can substitute dried fruit like raisins, replace with candy, use vegetables instead, OR just double-up on the other colors.
Instructions
NOTE: Steps 1-3 can be completed the day before your event and refrigerated over night. Step 5 should be saved for right before you leave / start setting up for the event so the marshmallows keep their fluffiness as long as possible (and not get stale and tough).
Step 1: Clean out your pans and make sure the smaller ones fit inside the larger one. You should have a little room between the little pans and the larger ones, which is where the marshmallows come into play later.

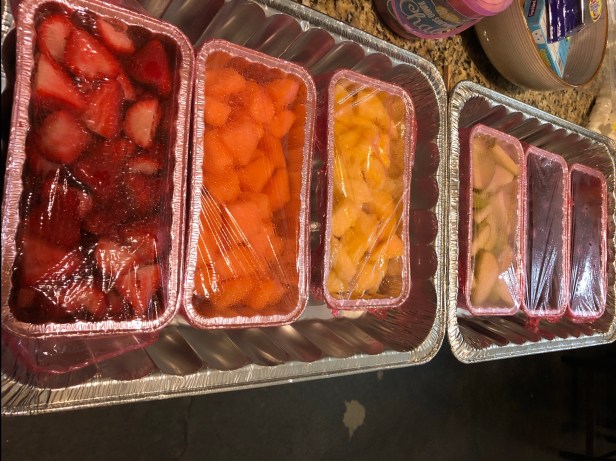
Step 2: Place your fruit by type and color in each of the smaller loaf pans. Now is a good time to cut up any large pieces to make them more bite-sized. If you have really juicy fruit and you want to cut down on the messiness, you can put paper towels in the bottom of the pans to absorb the extra liquid.

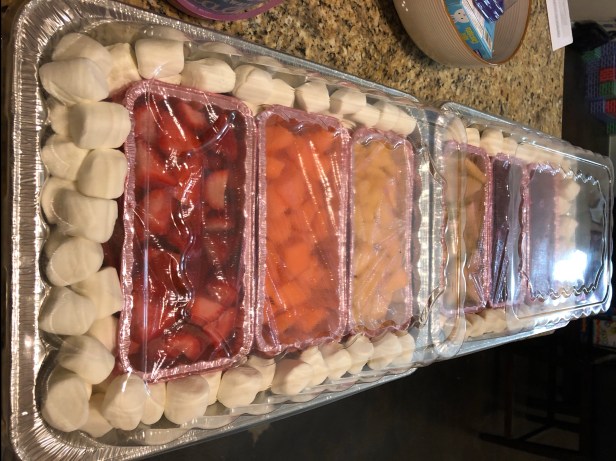
Step 3: If you’re serving this right away, skip to step 4. If you’re serving this in several hours or the next day, go ahead and cover the individual fruit pans with cling wrap (aka plastic wrap) to keep them as fresh as possible. It can also help contain the fruit during transport so no pieces bounce out if you hit a pothole on the way to the event.
If you’re doing this the day before the party, now is the time to refrigerate your fruit and pick this up again tomorrow morning!
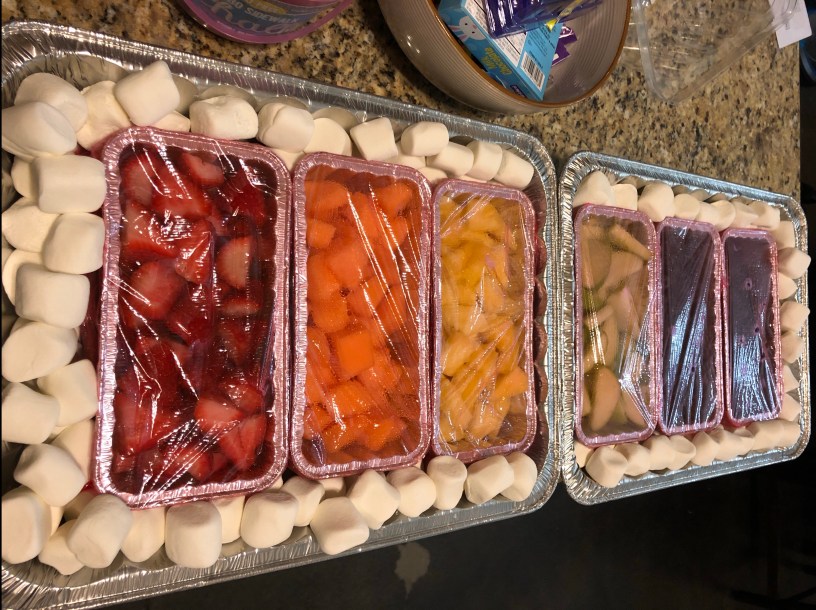
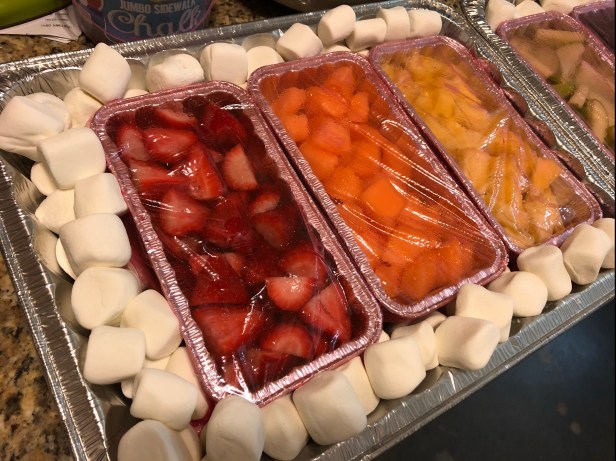
Step 4: Place the smaller pans of fruit inside the larger pans, making sure there is still room around the edges between the pans. Arrange them in rainbow-color order, so you now have a vertical rainbow line of fruit.
Step 5: This is the fun part: marshmallow stuffing! Place the marshmallows between the two layers of pans, really filling up the crevices. The marshmallow “clouds” are more than just fun things to eat with the fruit: they also add padding for the fruit trays to keep them from sliding around and can also absorb any fruit juices that leak out and could make a mess. I bet you didn’t know large marshmallows could be so helpful, huh?
Your final rainbow fruit tray with marshmallow clouds should look like this:

Step 6: Either use more cling wrap or a lid if your pan came with one and cover the top of your trays. You are now good to go!
This was very easy to assemble and even easier to serve. I probably spent more time deciding which fruit to use than actually making the tray, HA! All in all the kids loved this (and I’m fairly sure the teachers enjoyed what was left after the party, too.)
Happy eventing!
