
Winter can be so very gray, and, when the post-holiday blues hit, your mood can feel as low as the weather. While we can’t make a sunny Spring day get to you any faster, we can help you make you and yours feel a little warmer and cozier with our DIY Cozy Kits. Most of these items can be made in advance, so make some extras as Christmas gifts, care packages, or “get better soon” baskets. You never know when you or a loved one might need one!
Kit Contents
When building a kit around a feeling like or theme, one tactic is to use different senses like touch, taste, or smell. For this cozy kit, here are some ideas:
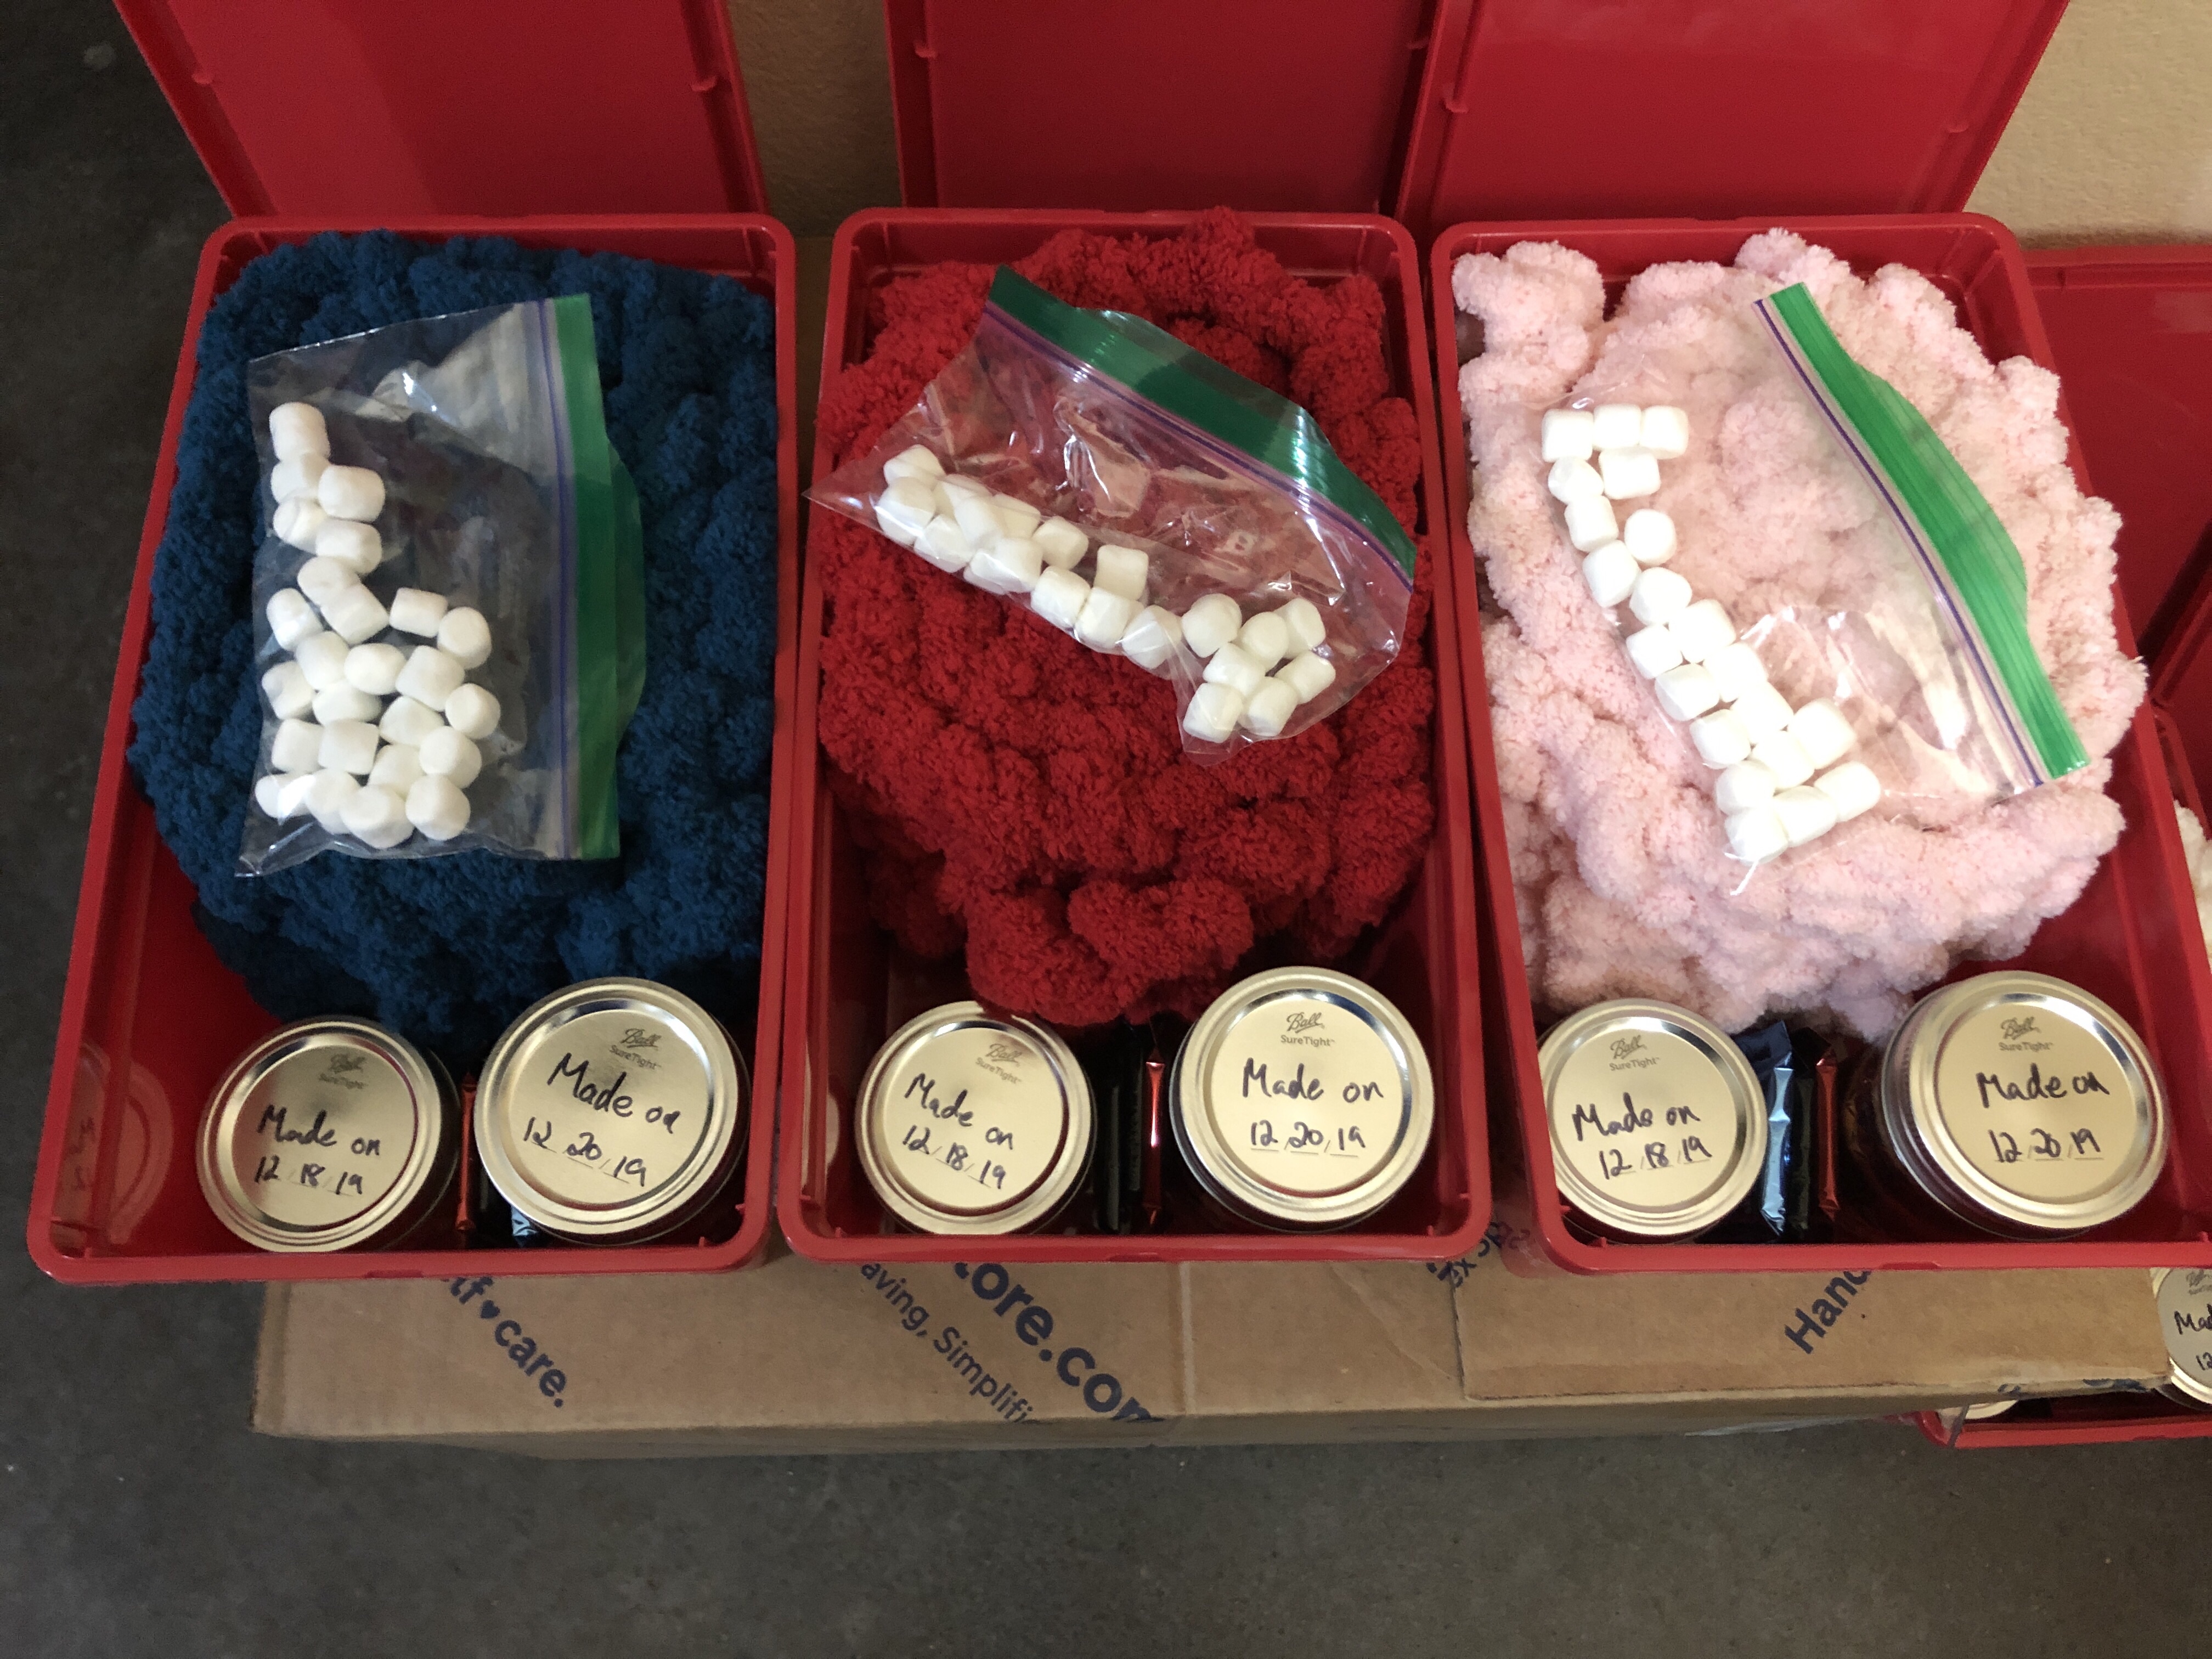
- TOUCH: We hand-knitted chenille scarves or bought affordable, fuzzy slipper socks to give the recipient something soft and warm to hold and snuggle. If the gift is for the young or the simply young-at-heart, consider a stuffed animal. TIP: If you’re on a tight timeline or tight budget, here’s an easy trick: anti-pill fleece, also known as blizzard fleece! You don’t have to hem it, which means no sewing, so you can easily cut strips of it into fleece scarves. Add a little extra flare at the end of each scarf with one-inch wide fringe. COZY!
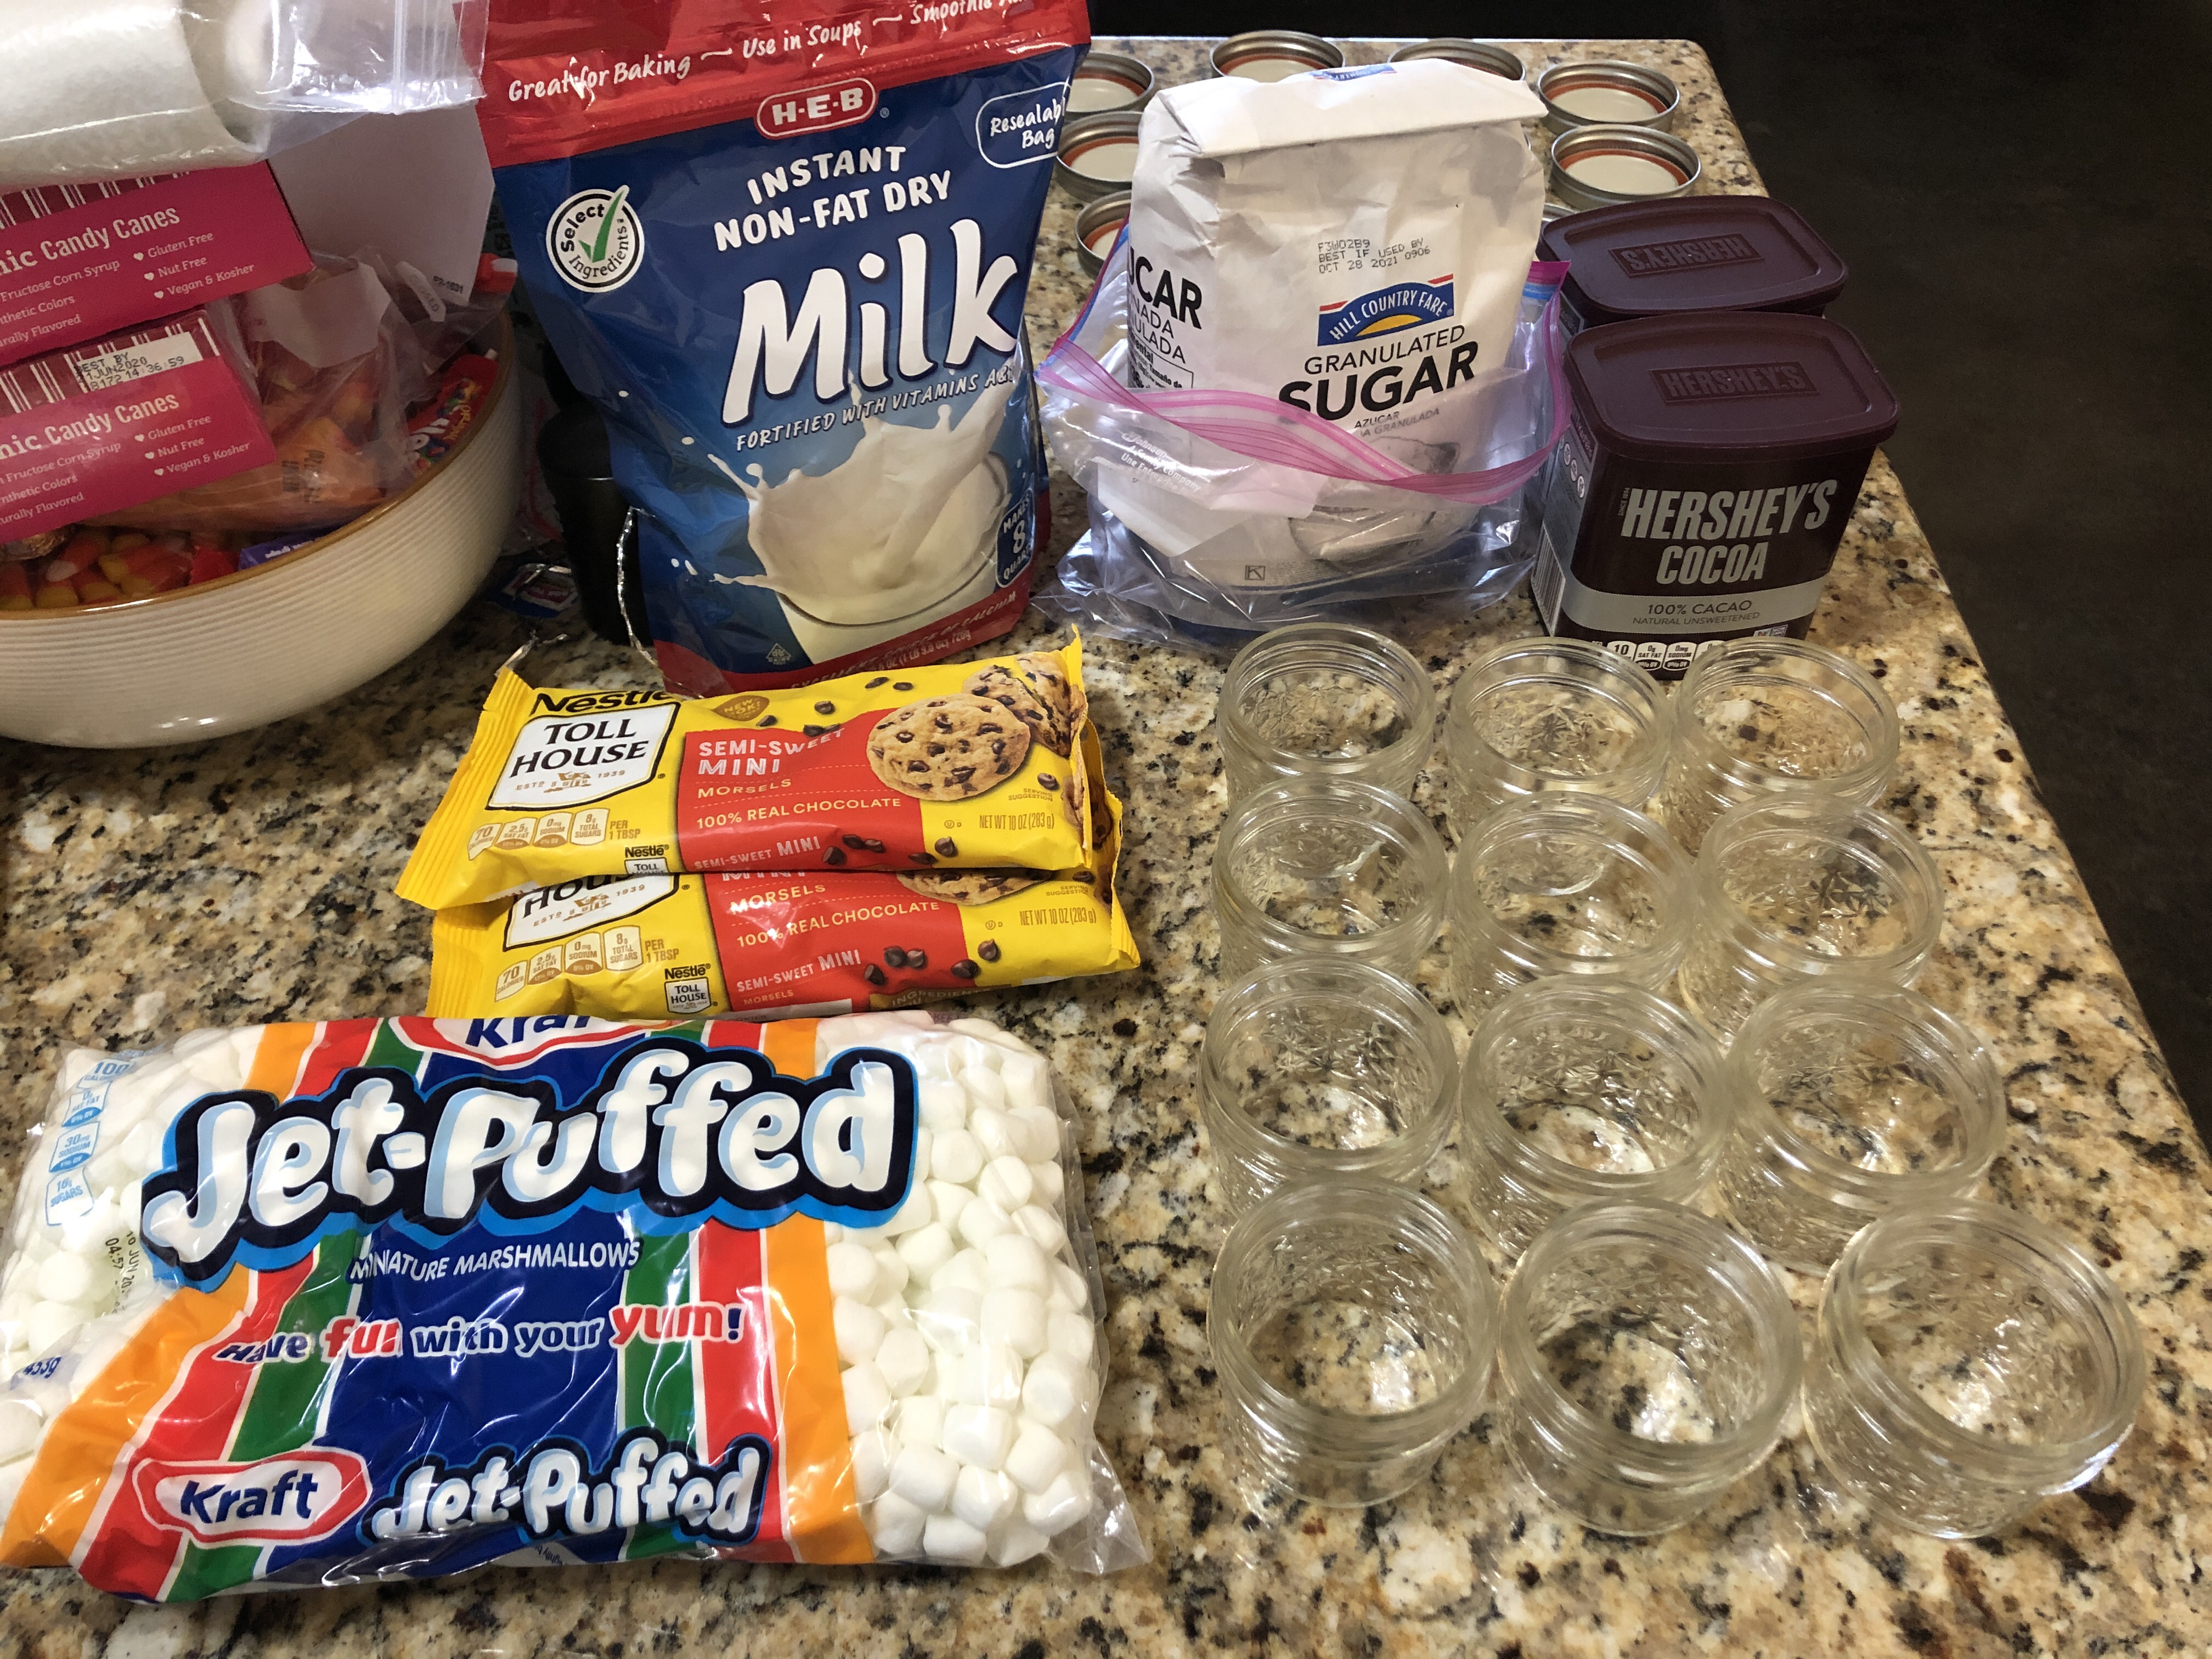
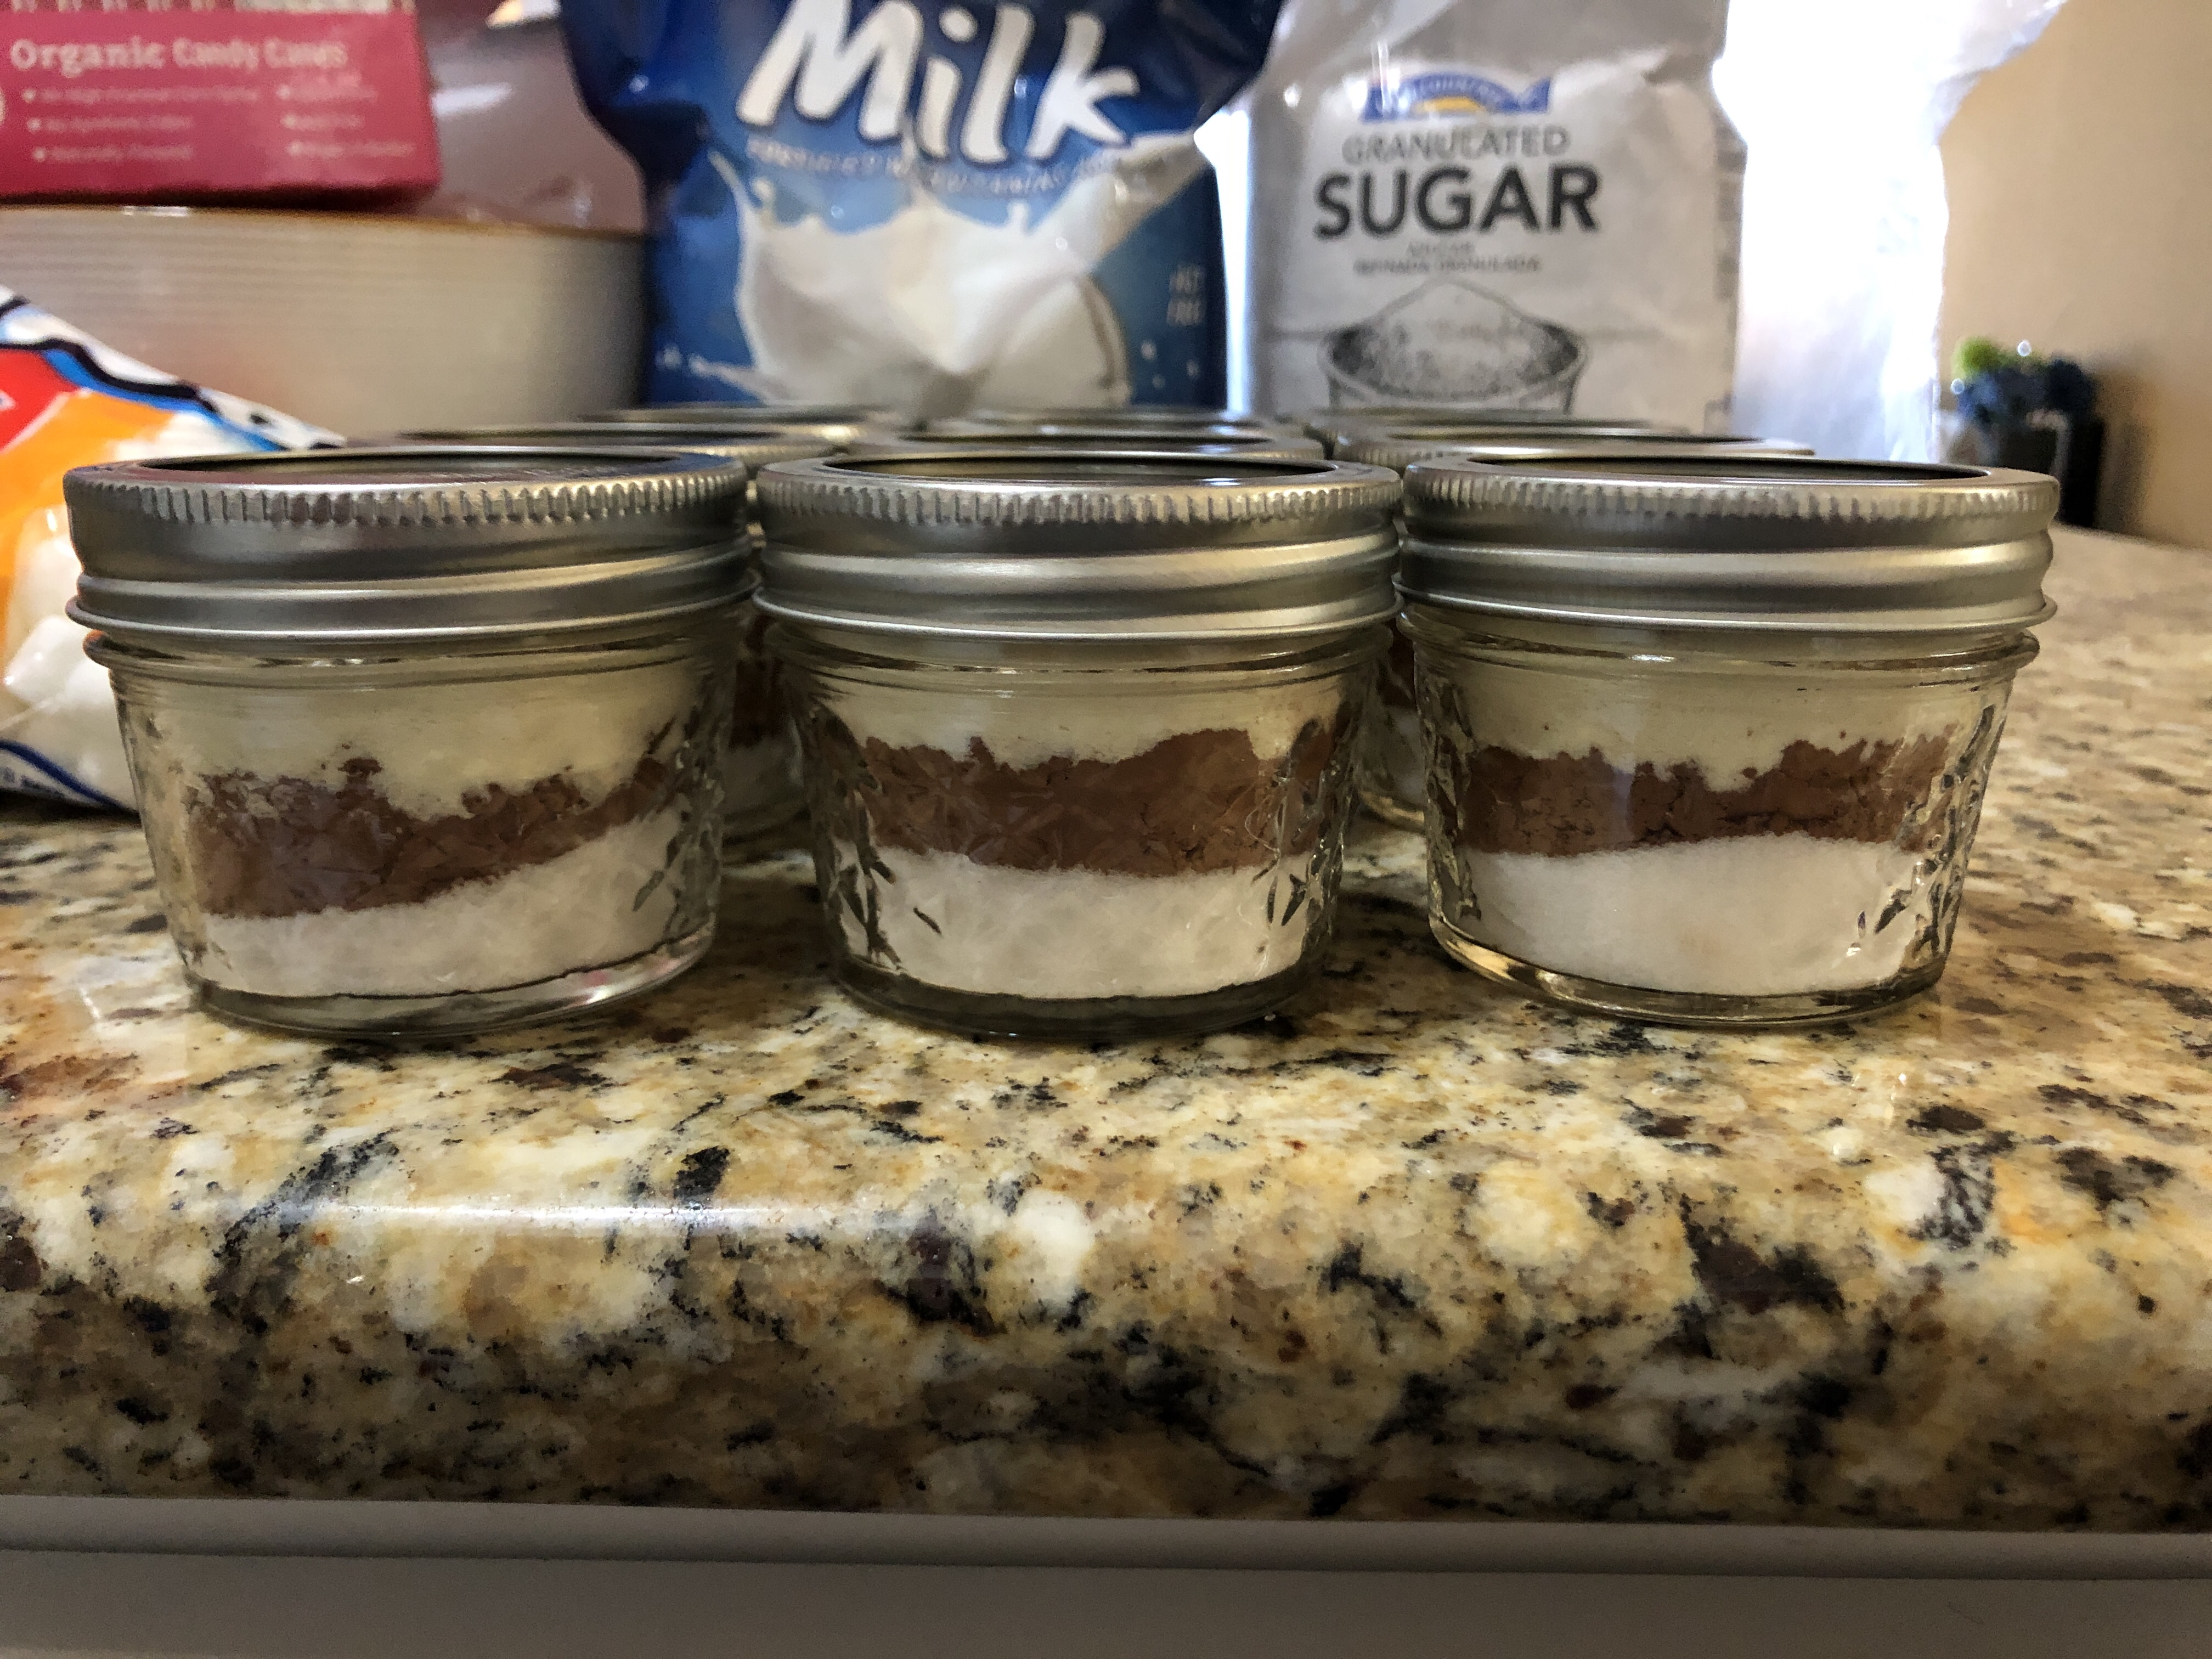
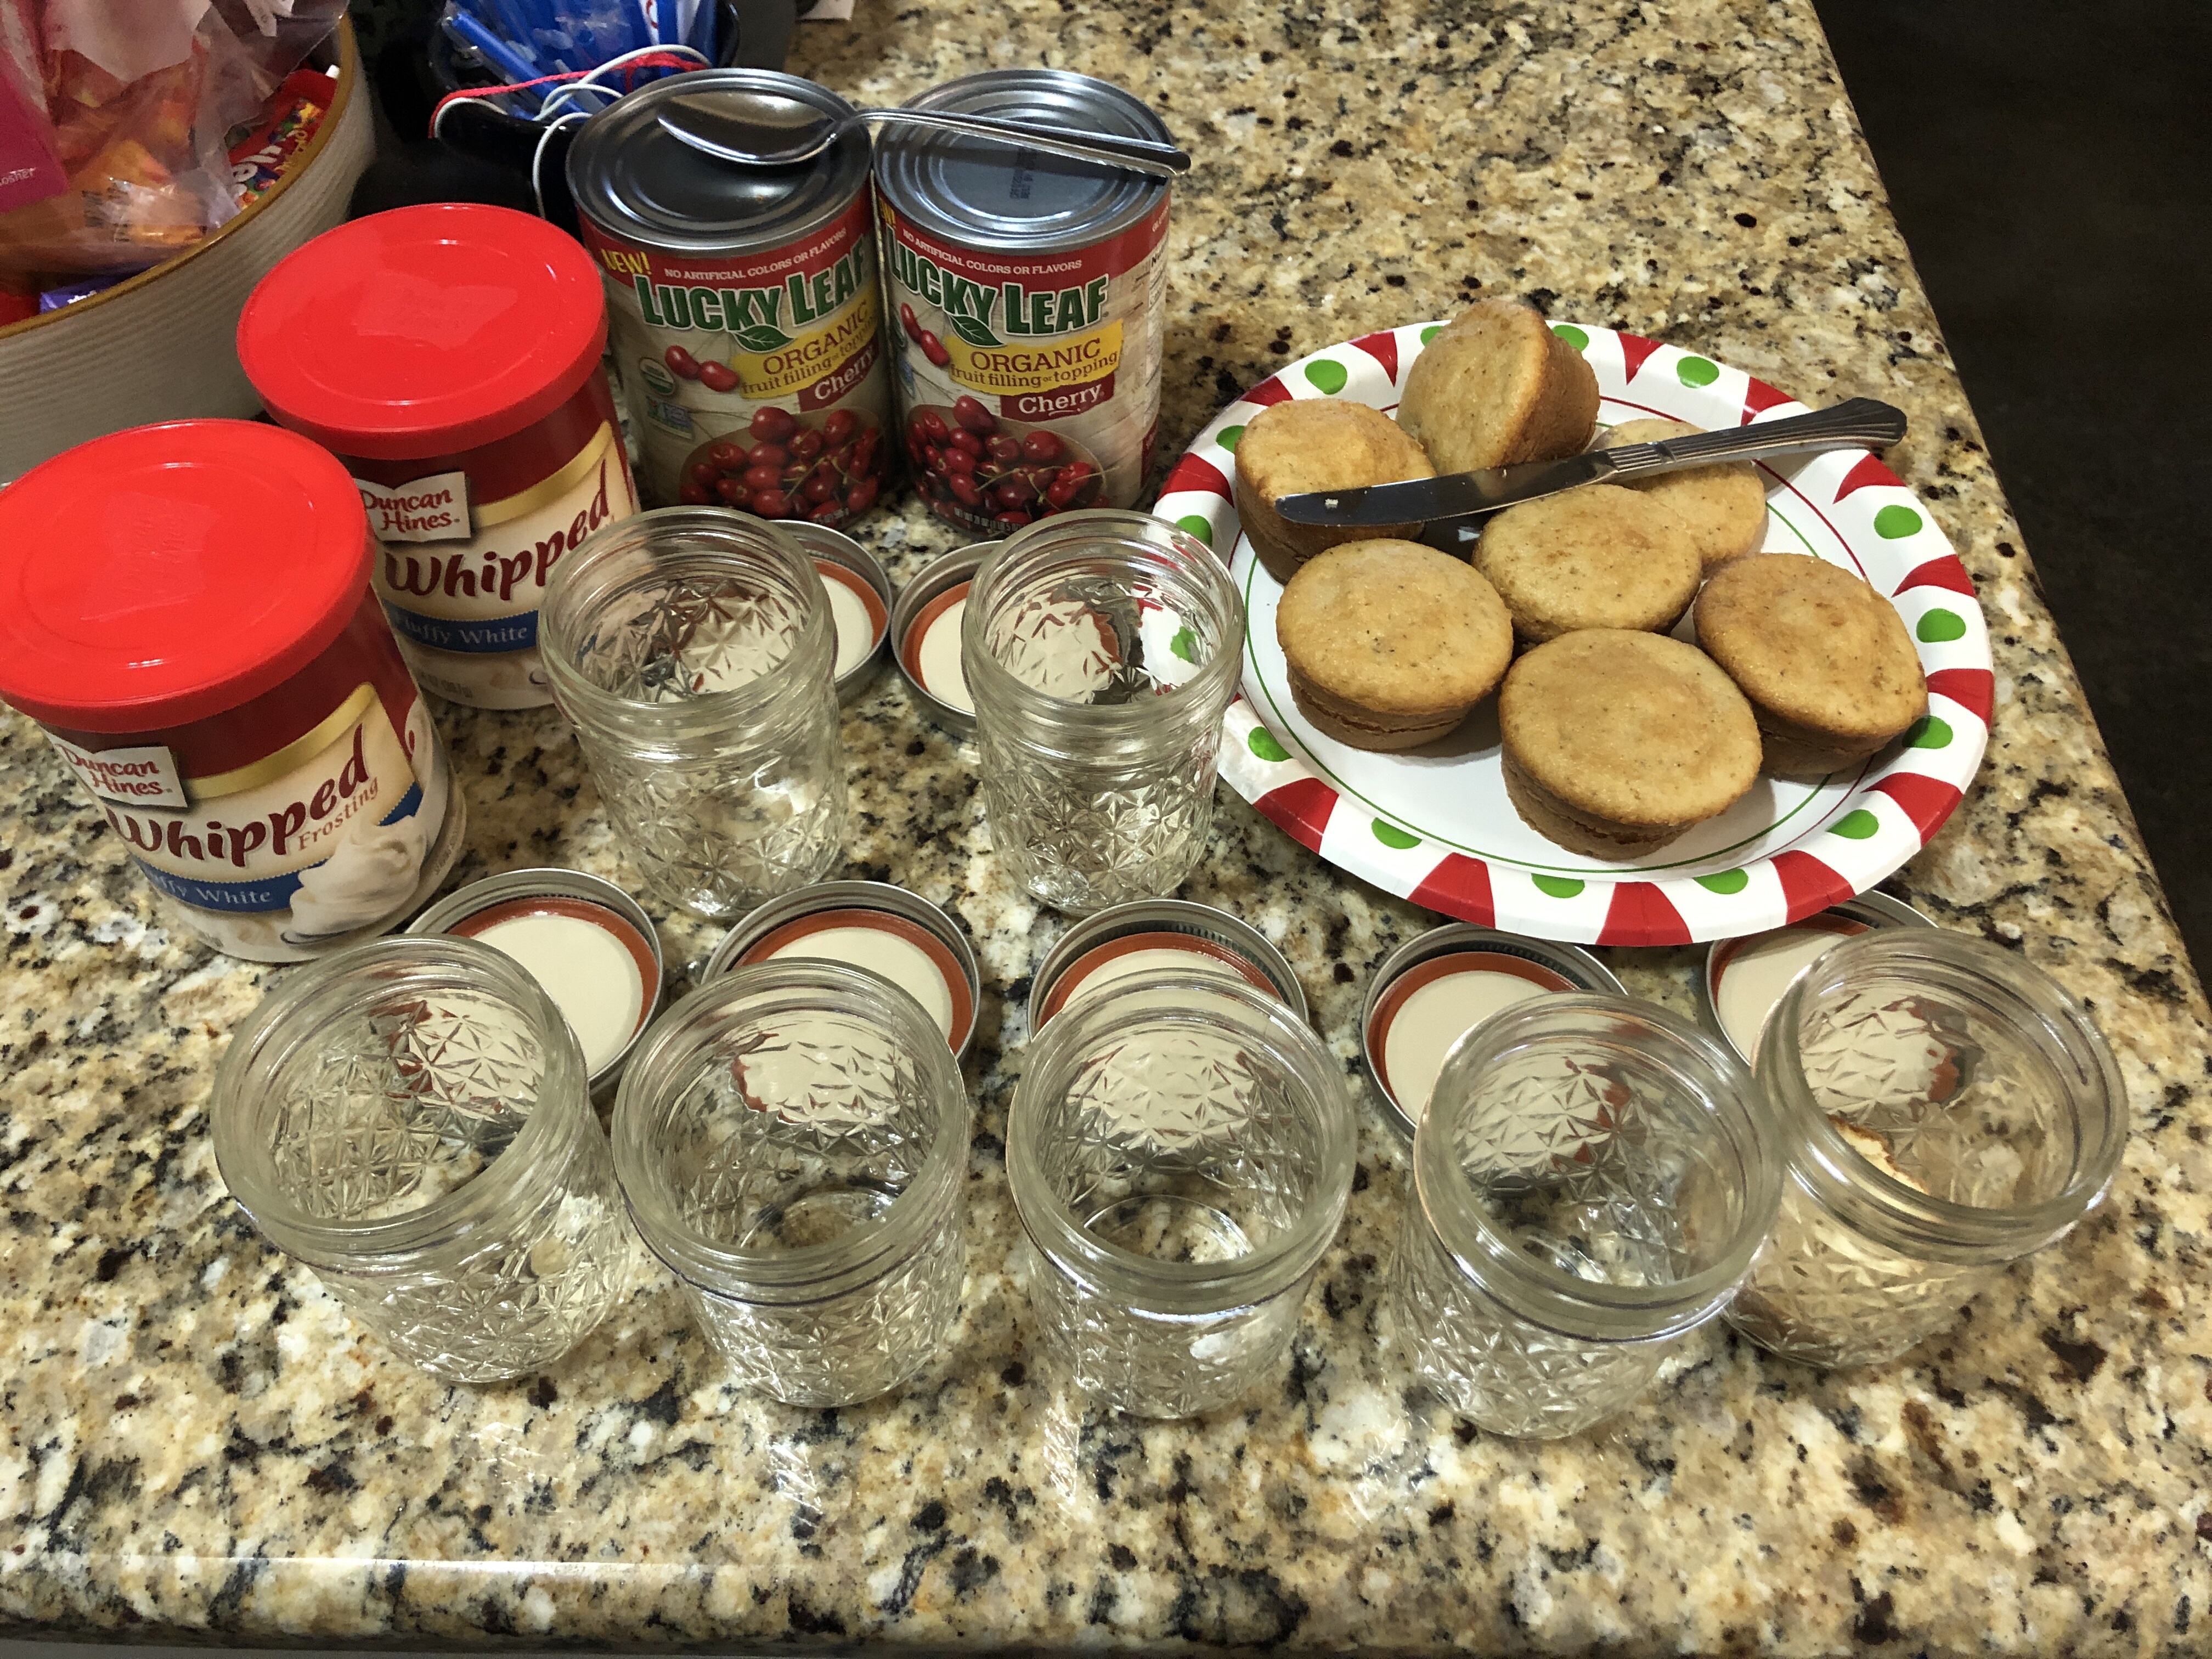
- TASTE: Yes, you can always put in sweet treats like candy (and, yes, we did), but we like to take it a step further. Because it also needs to be easily sealed and transported, that meant an easy solution: mason jars! We added homemade, instant hot chocolate (recipe and steps below) to 4 ounce jars and “cakes” (steps below) to 8 ounce jars. That’s a little to drink and a little to eat, all on a night when you deserve the indulgence. If your recipients are more into salty snacks, these also do well and keep their crispness in mason jars.
- SCENT: Scented candles and incense are faaaahbulous, dahling, but make sure you wrap them very, very well so the smell doesn’t infiltrate your touch and taste items.
- SOUND: This one can be a bit more challenging if you don’t know what kind of music the recipient likes. When in doubt, go for a CD of nature sounds. Have the time to plan and do something really touching? Interview people who know the recipient and record them sharing stories and memories of good times!
- SIGHT: Nothing warms the heart quite like a sweet note, making this item both the most heart-felt and easiest item in the kit.
Hot Chocolate in a Jar
For our hot chocolate in a jar recipe, we started with this Food Network recipe from Ree Drummond, aka the Pioneer Woman, and altered it to suit our taste based on some of the comments in the original article. Feel free to follow either or modify it yourself!
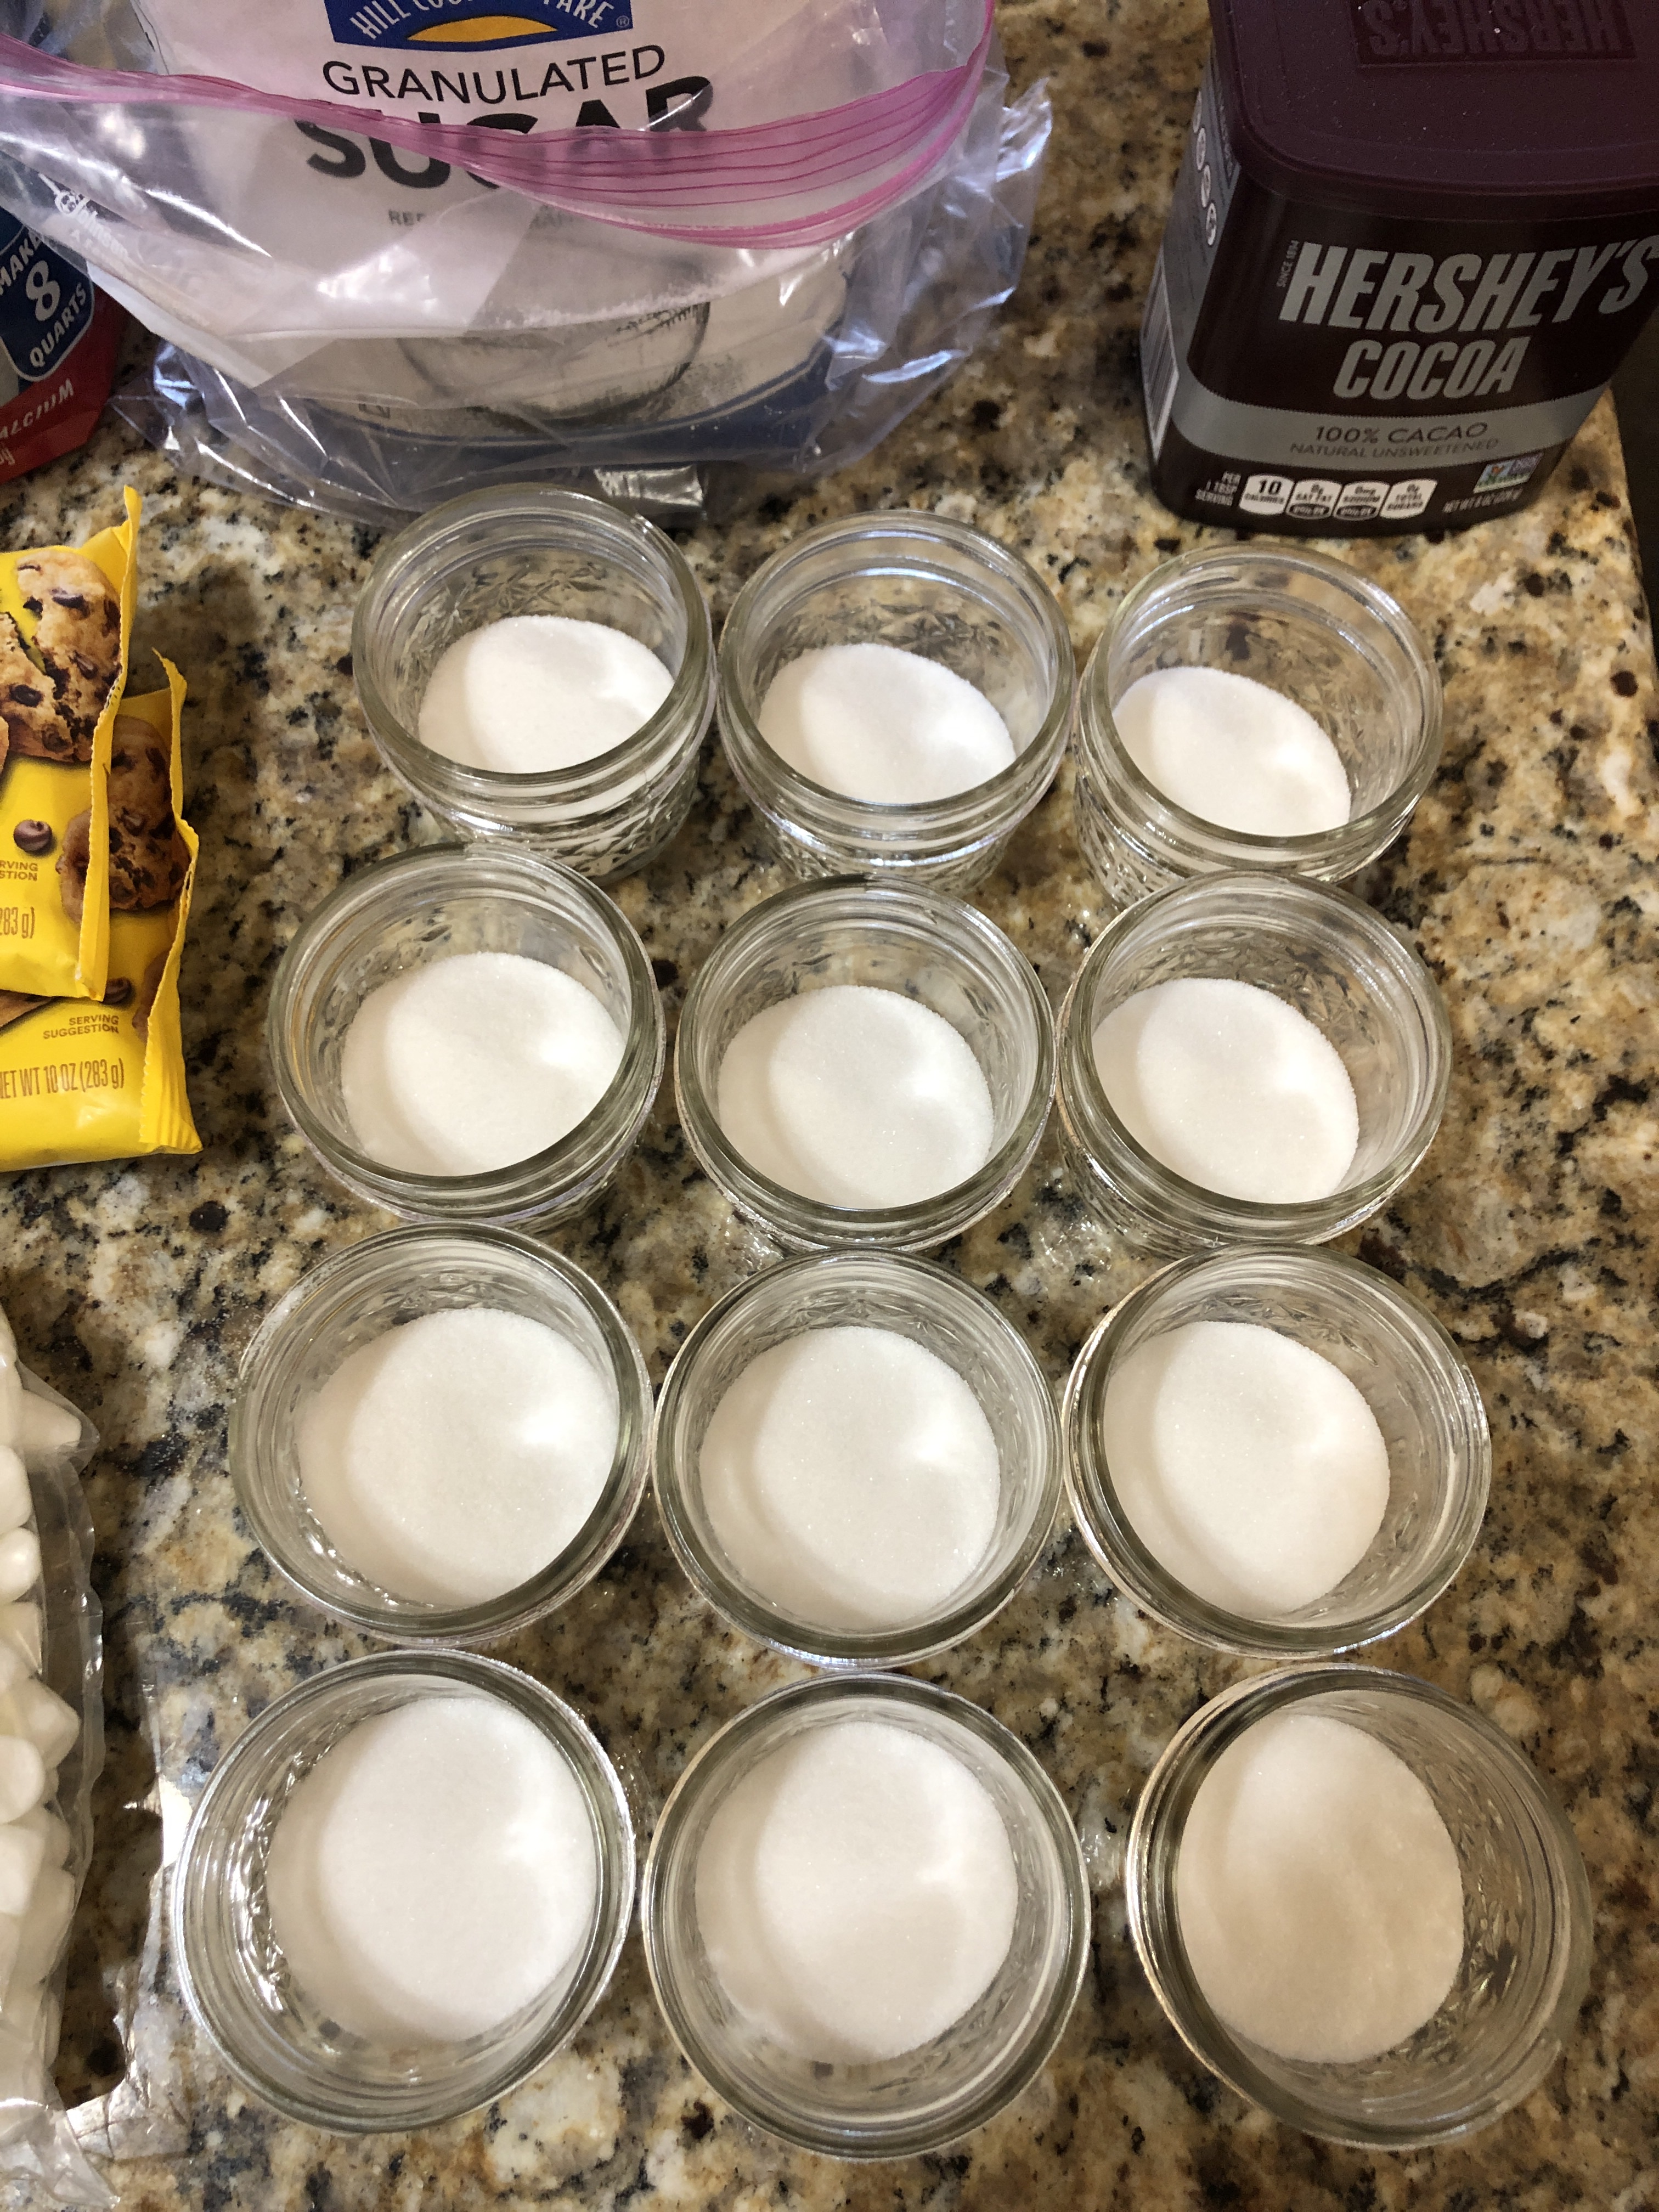
Supplies Per 4 oz. Jar (multiply by number of jars needed)
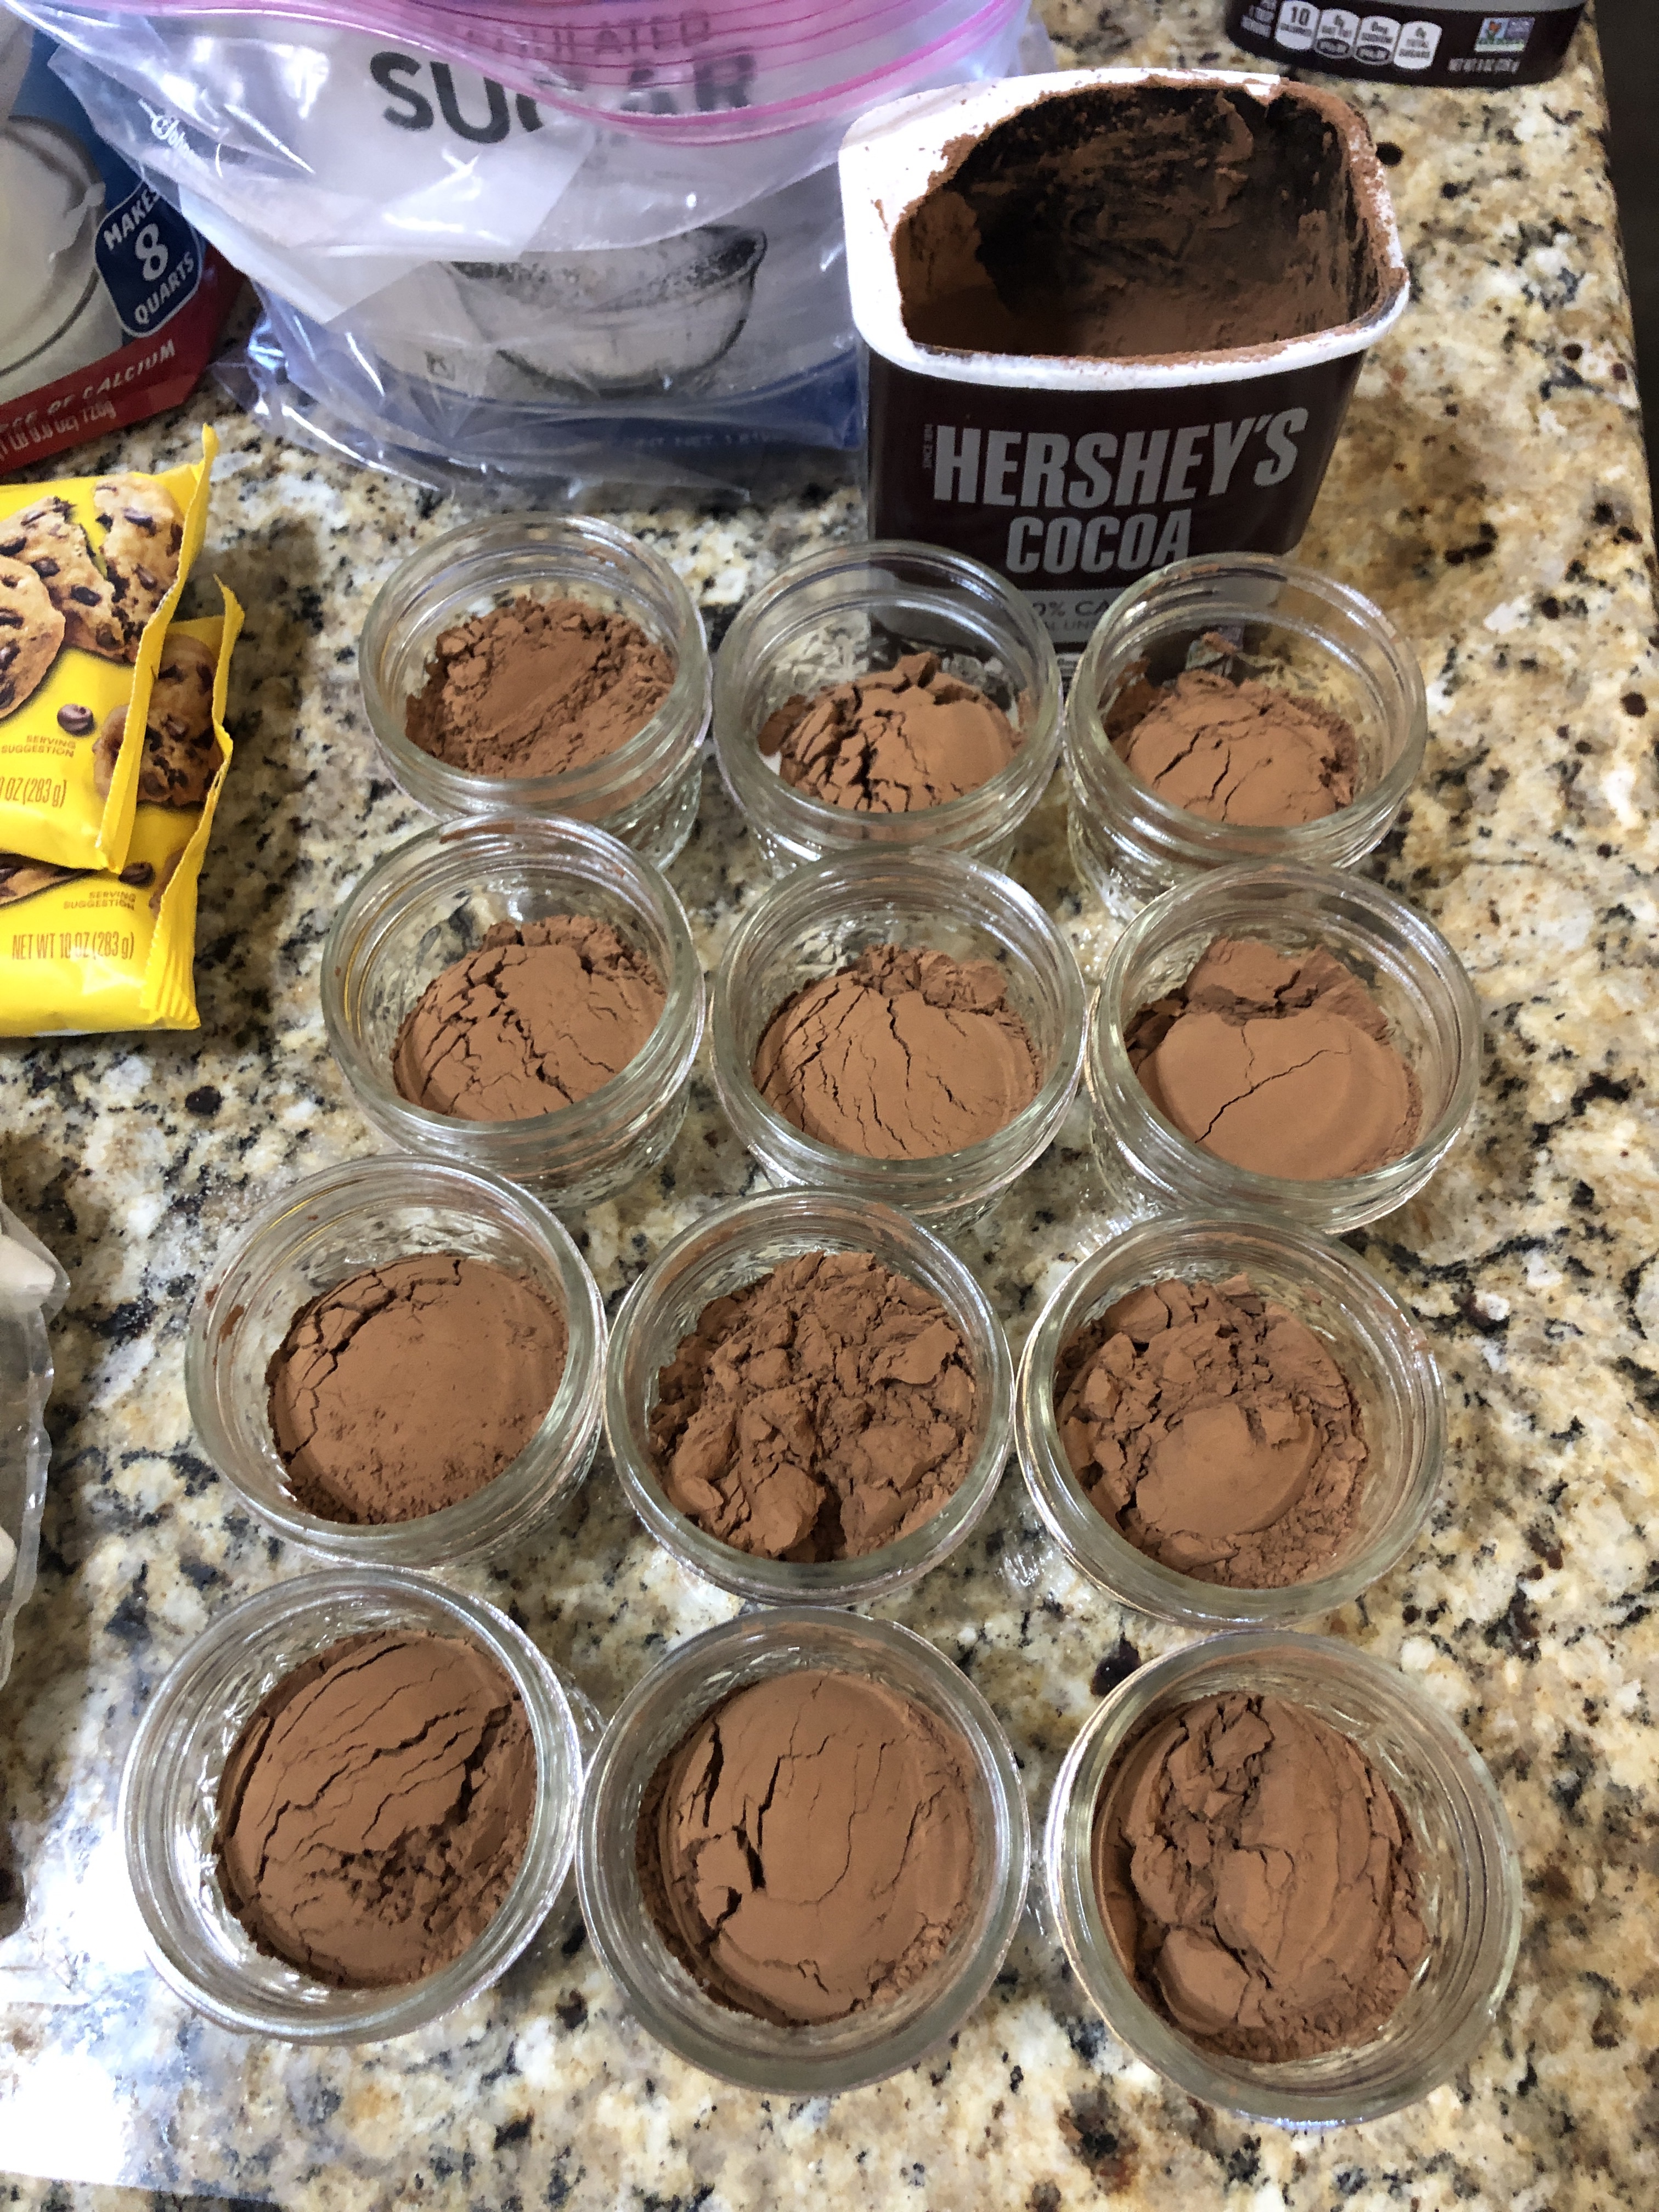
- 2 tblsp unsweetened cocoa powder
- 2 tblsp granulated sugar
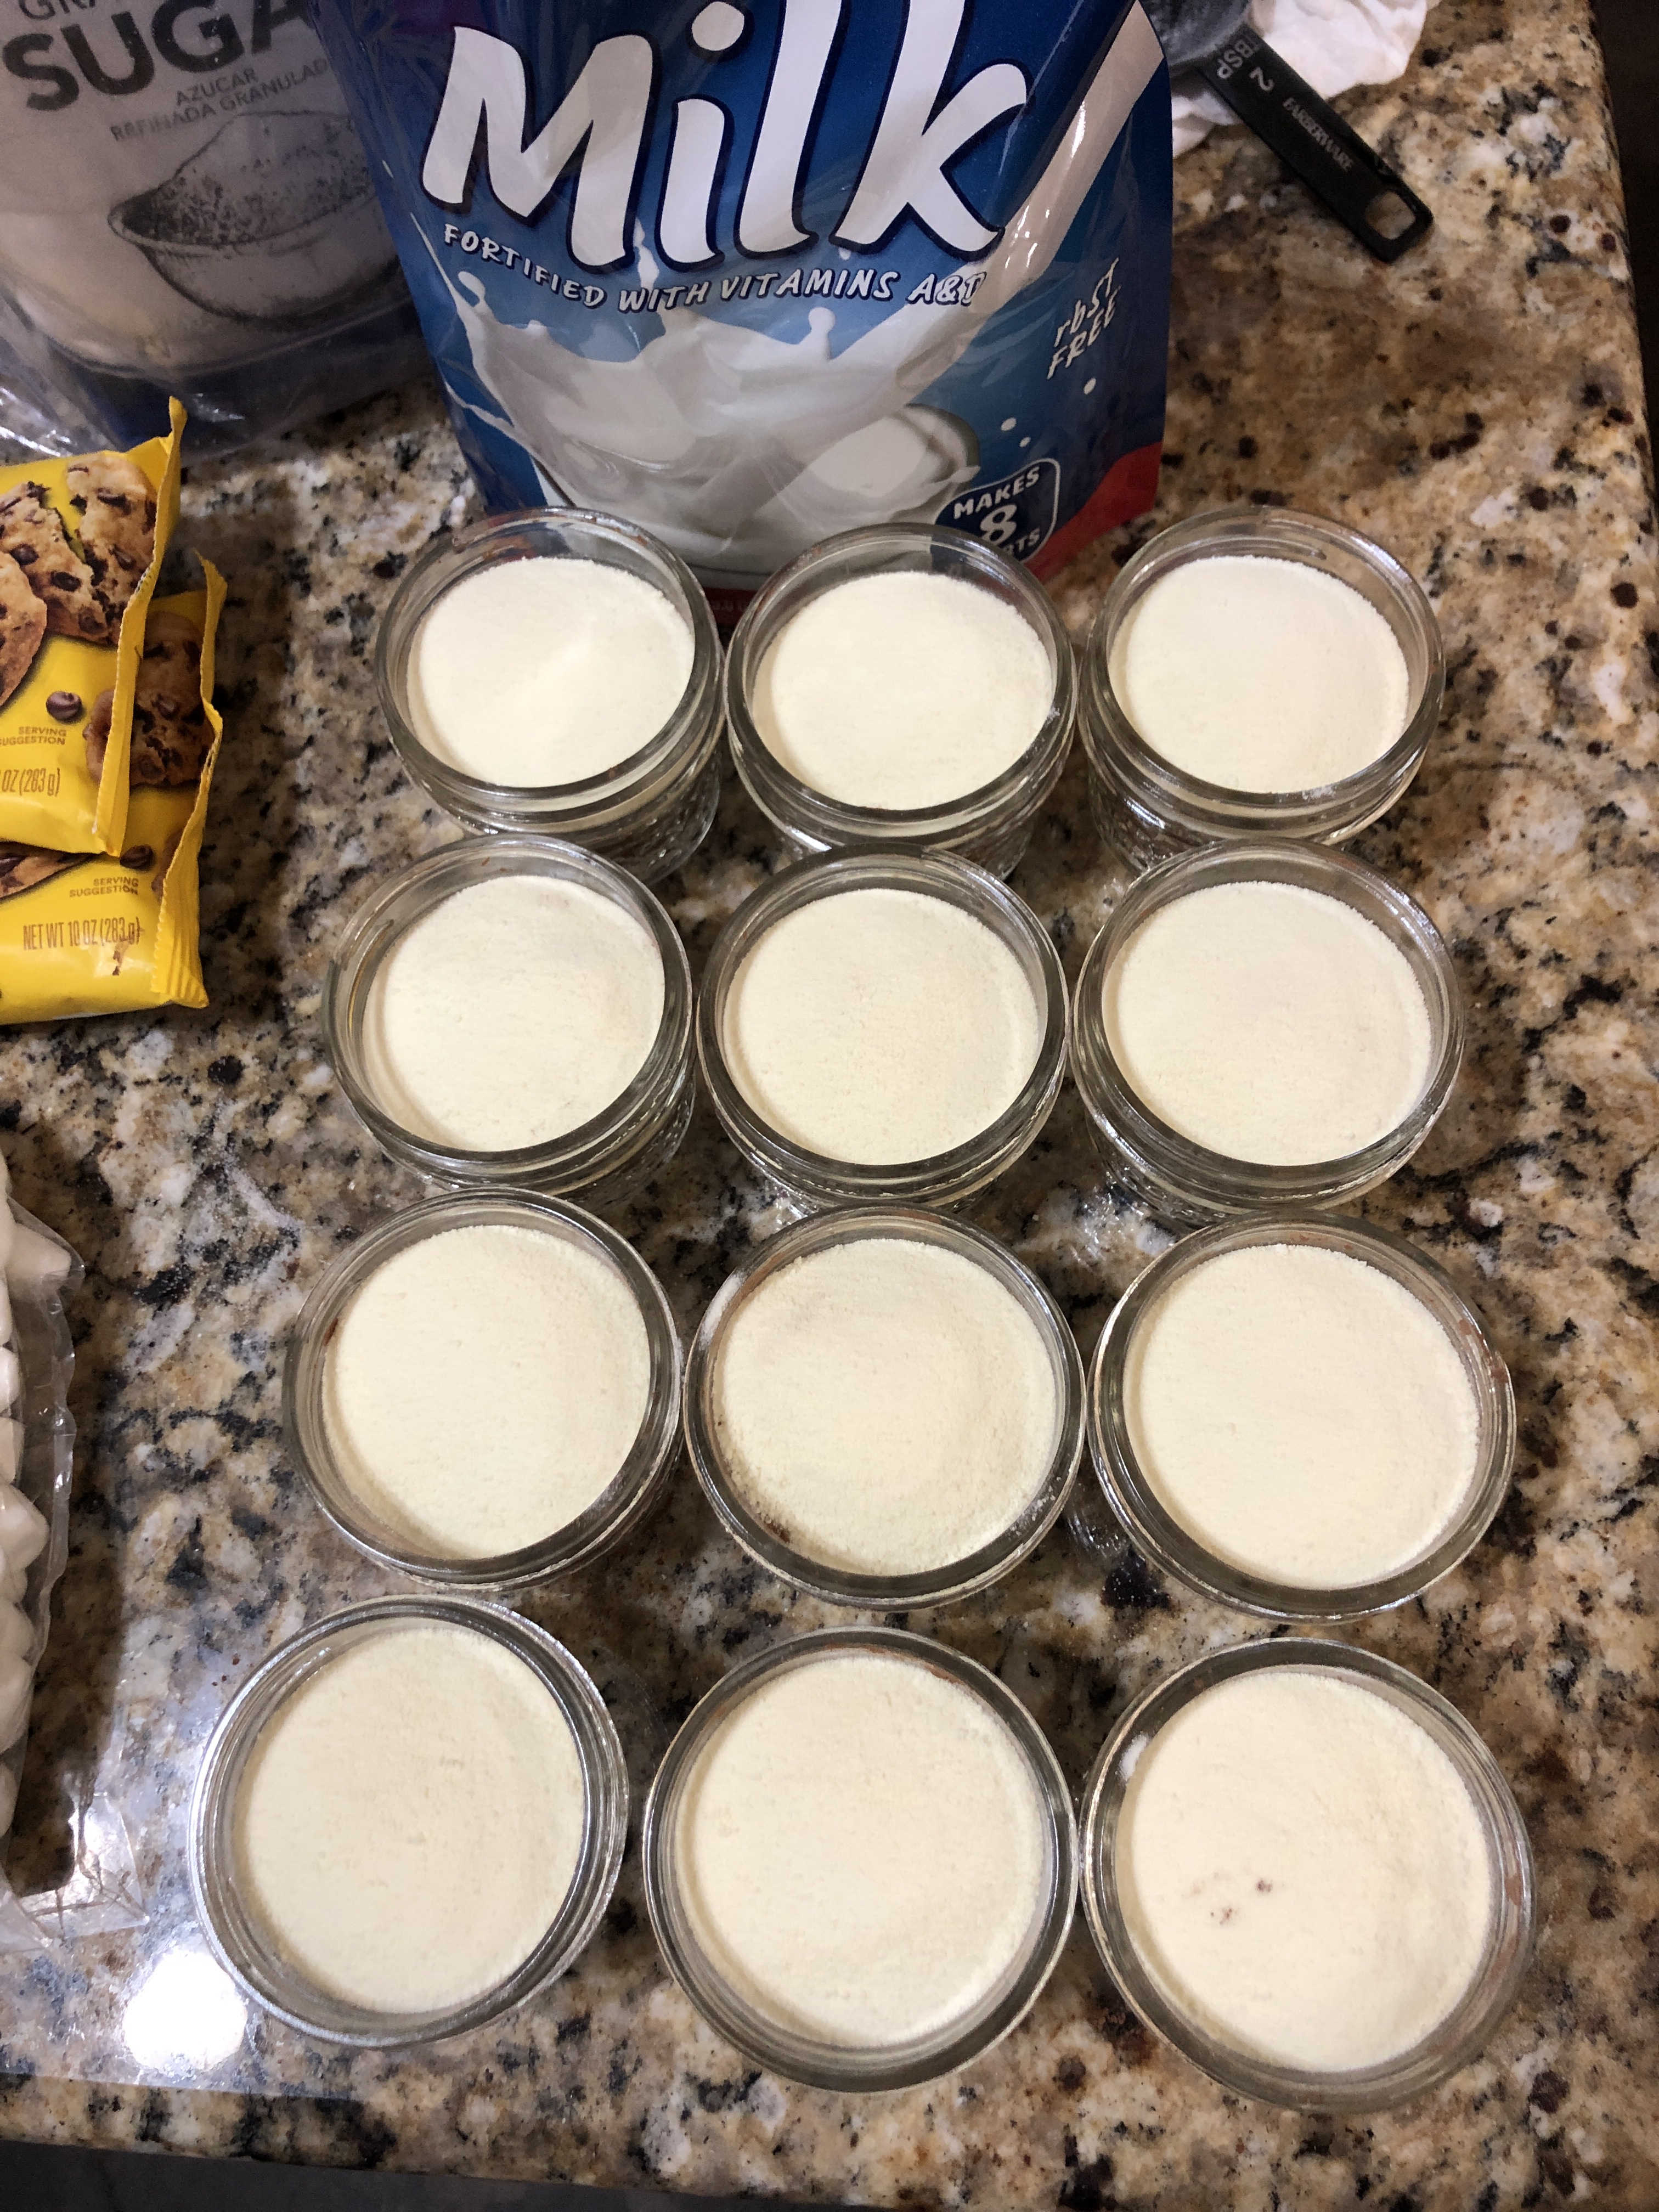
- 2 tblsp instant dried milk
- pinch of salt
- Optional: chocolate chips, mini marshmallows, etc.
NOTE: While we initially included chocolate chips, they left a chunky residue at the bottom of the mug that was unappealing. We’d recommend leaving them out or reducing the amount. Also, our 4 oz. jars were too small to hold the mini marshmallows, so we included them in separate snack-sized bags with the jars.
STEP 1: Add 2 tablespoons of sugar and a pinch of salt to each jar.
STEP 2: Add 2 tablespoons of cocoa powder to each jar.
STEP 3: Add 2 tablespoons of dried milk to each jar.
STEP 4: Add any optional ingredients to each jar and seal it. All done!
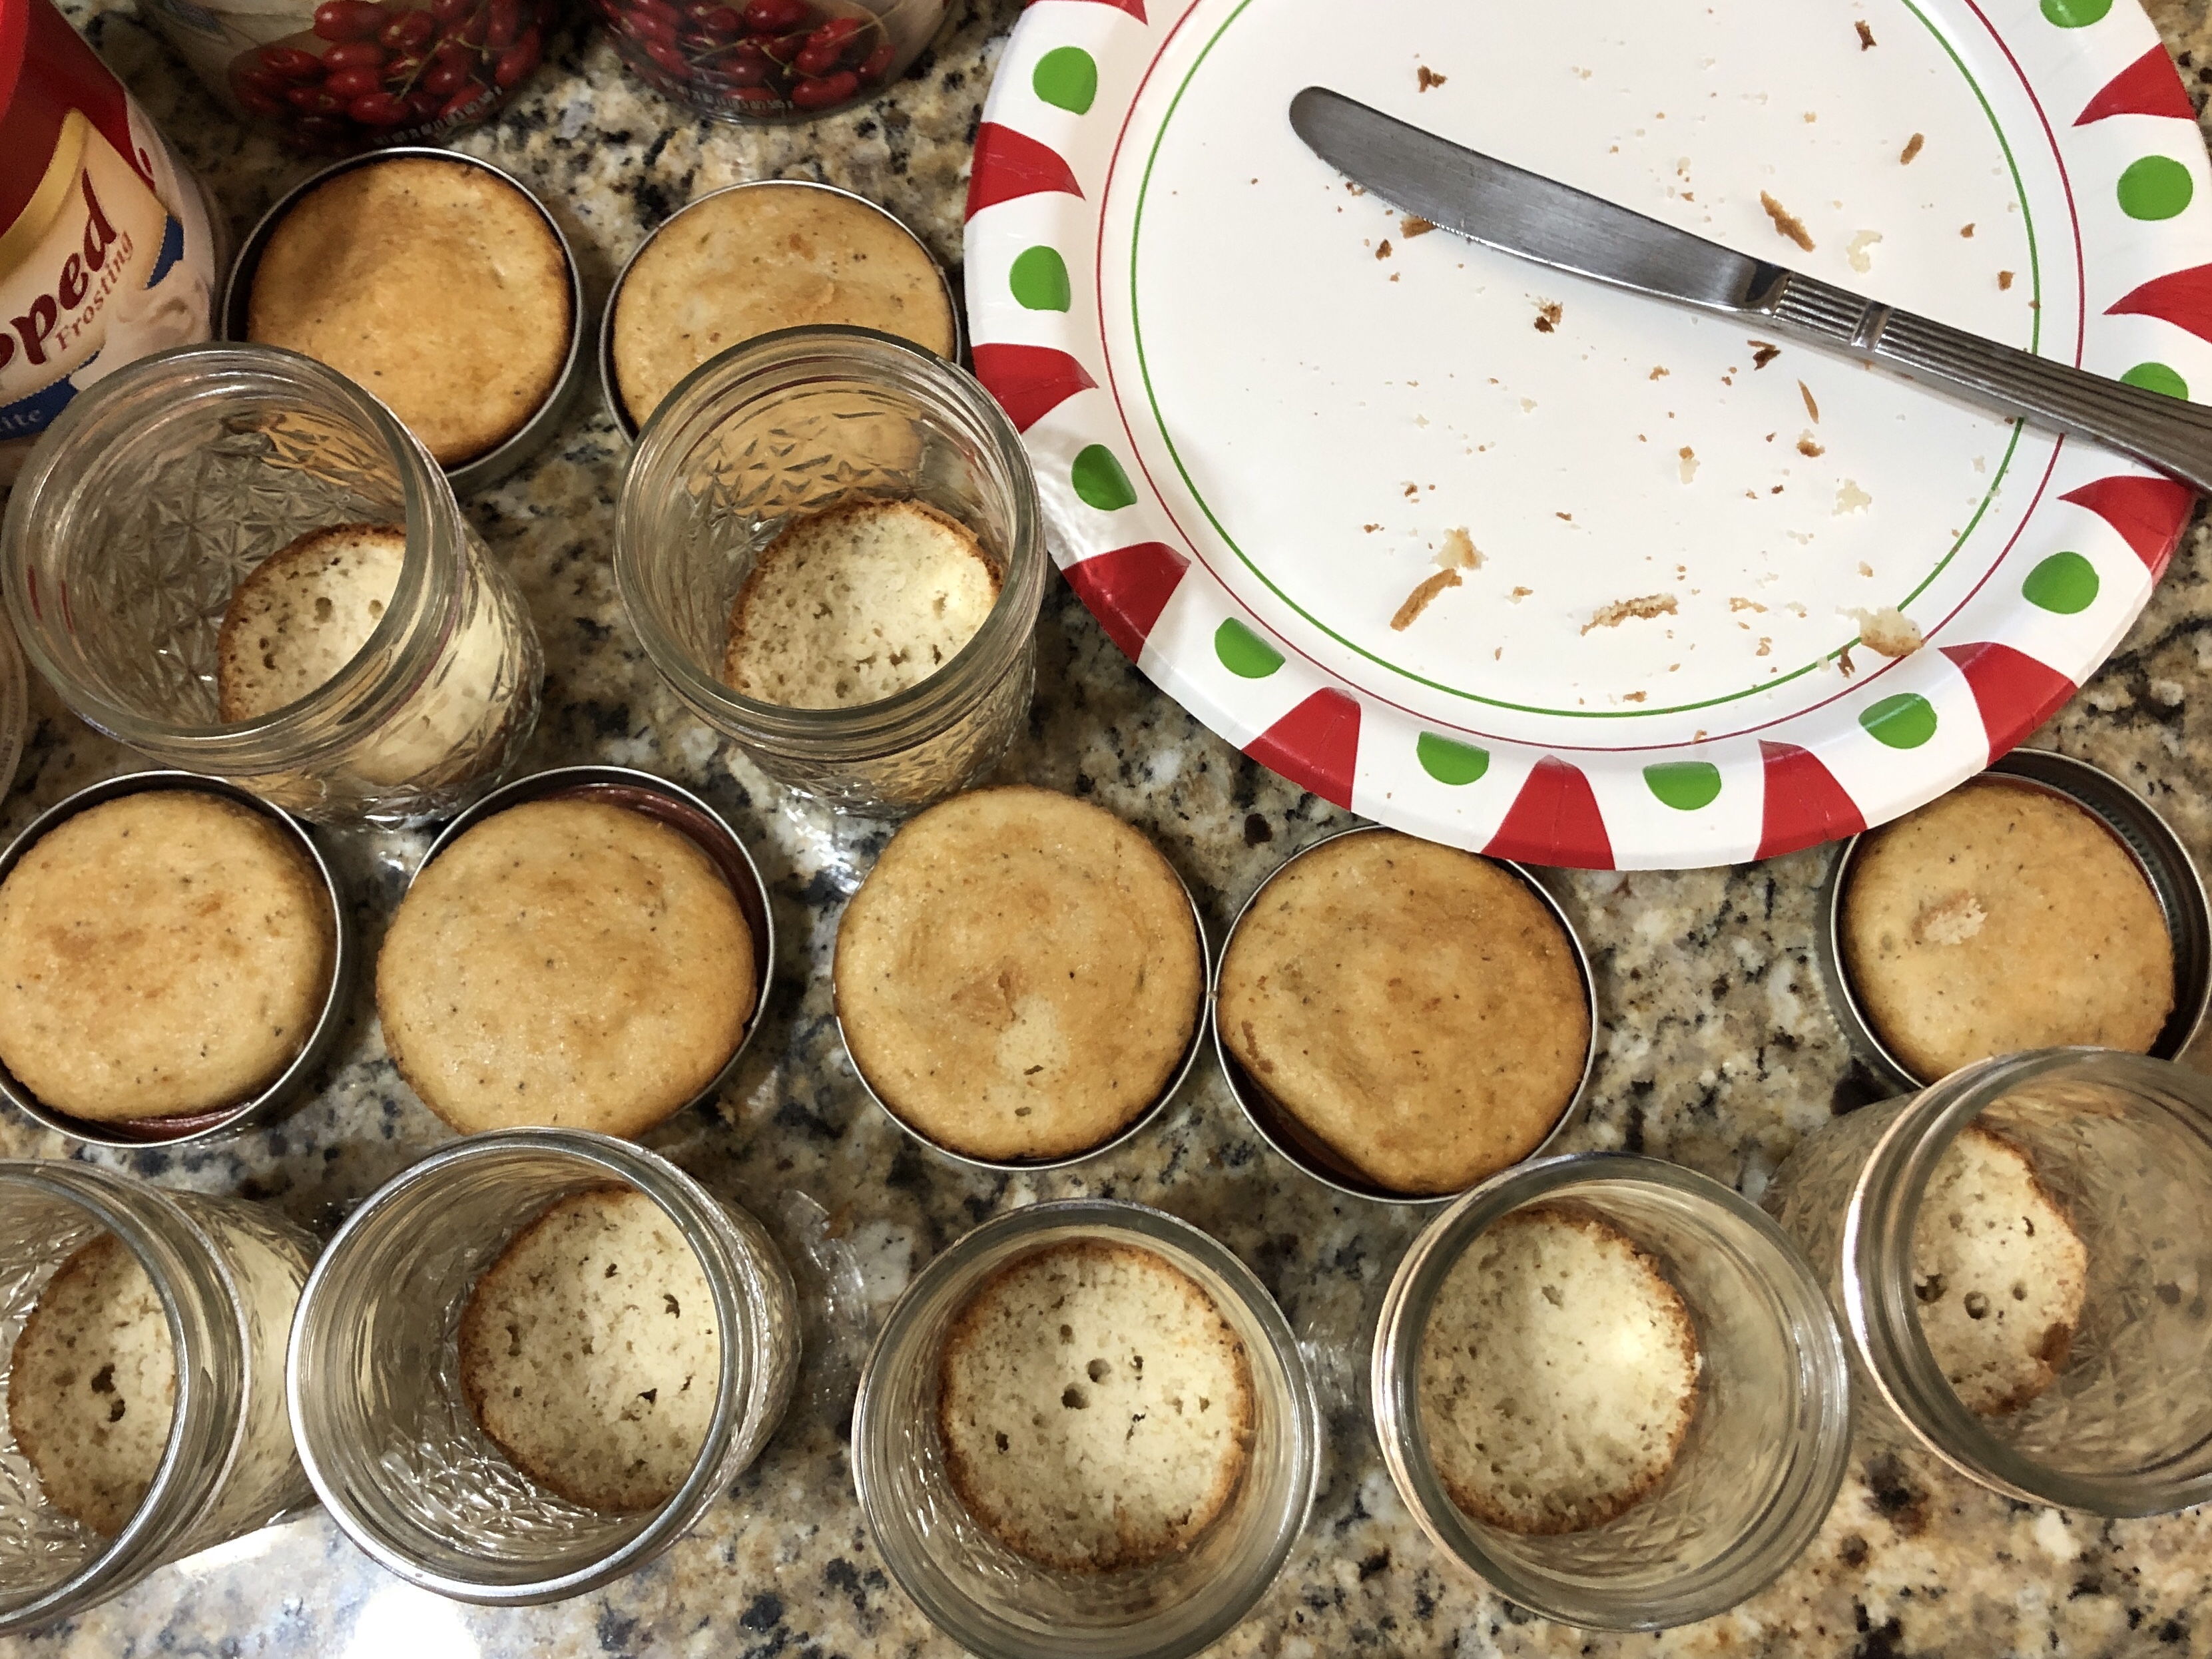
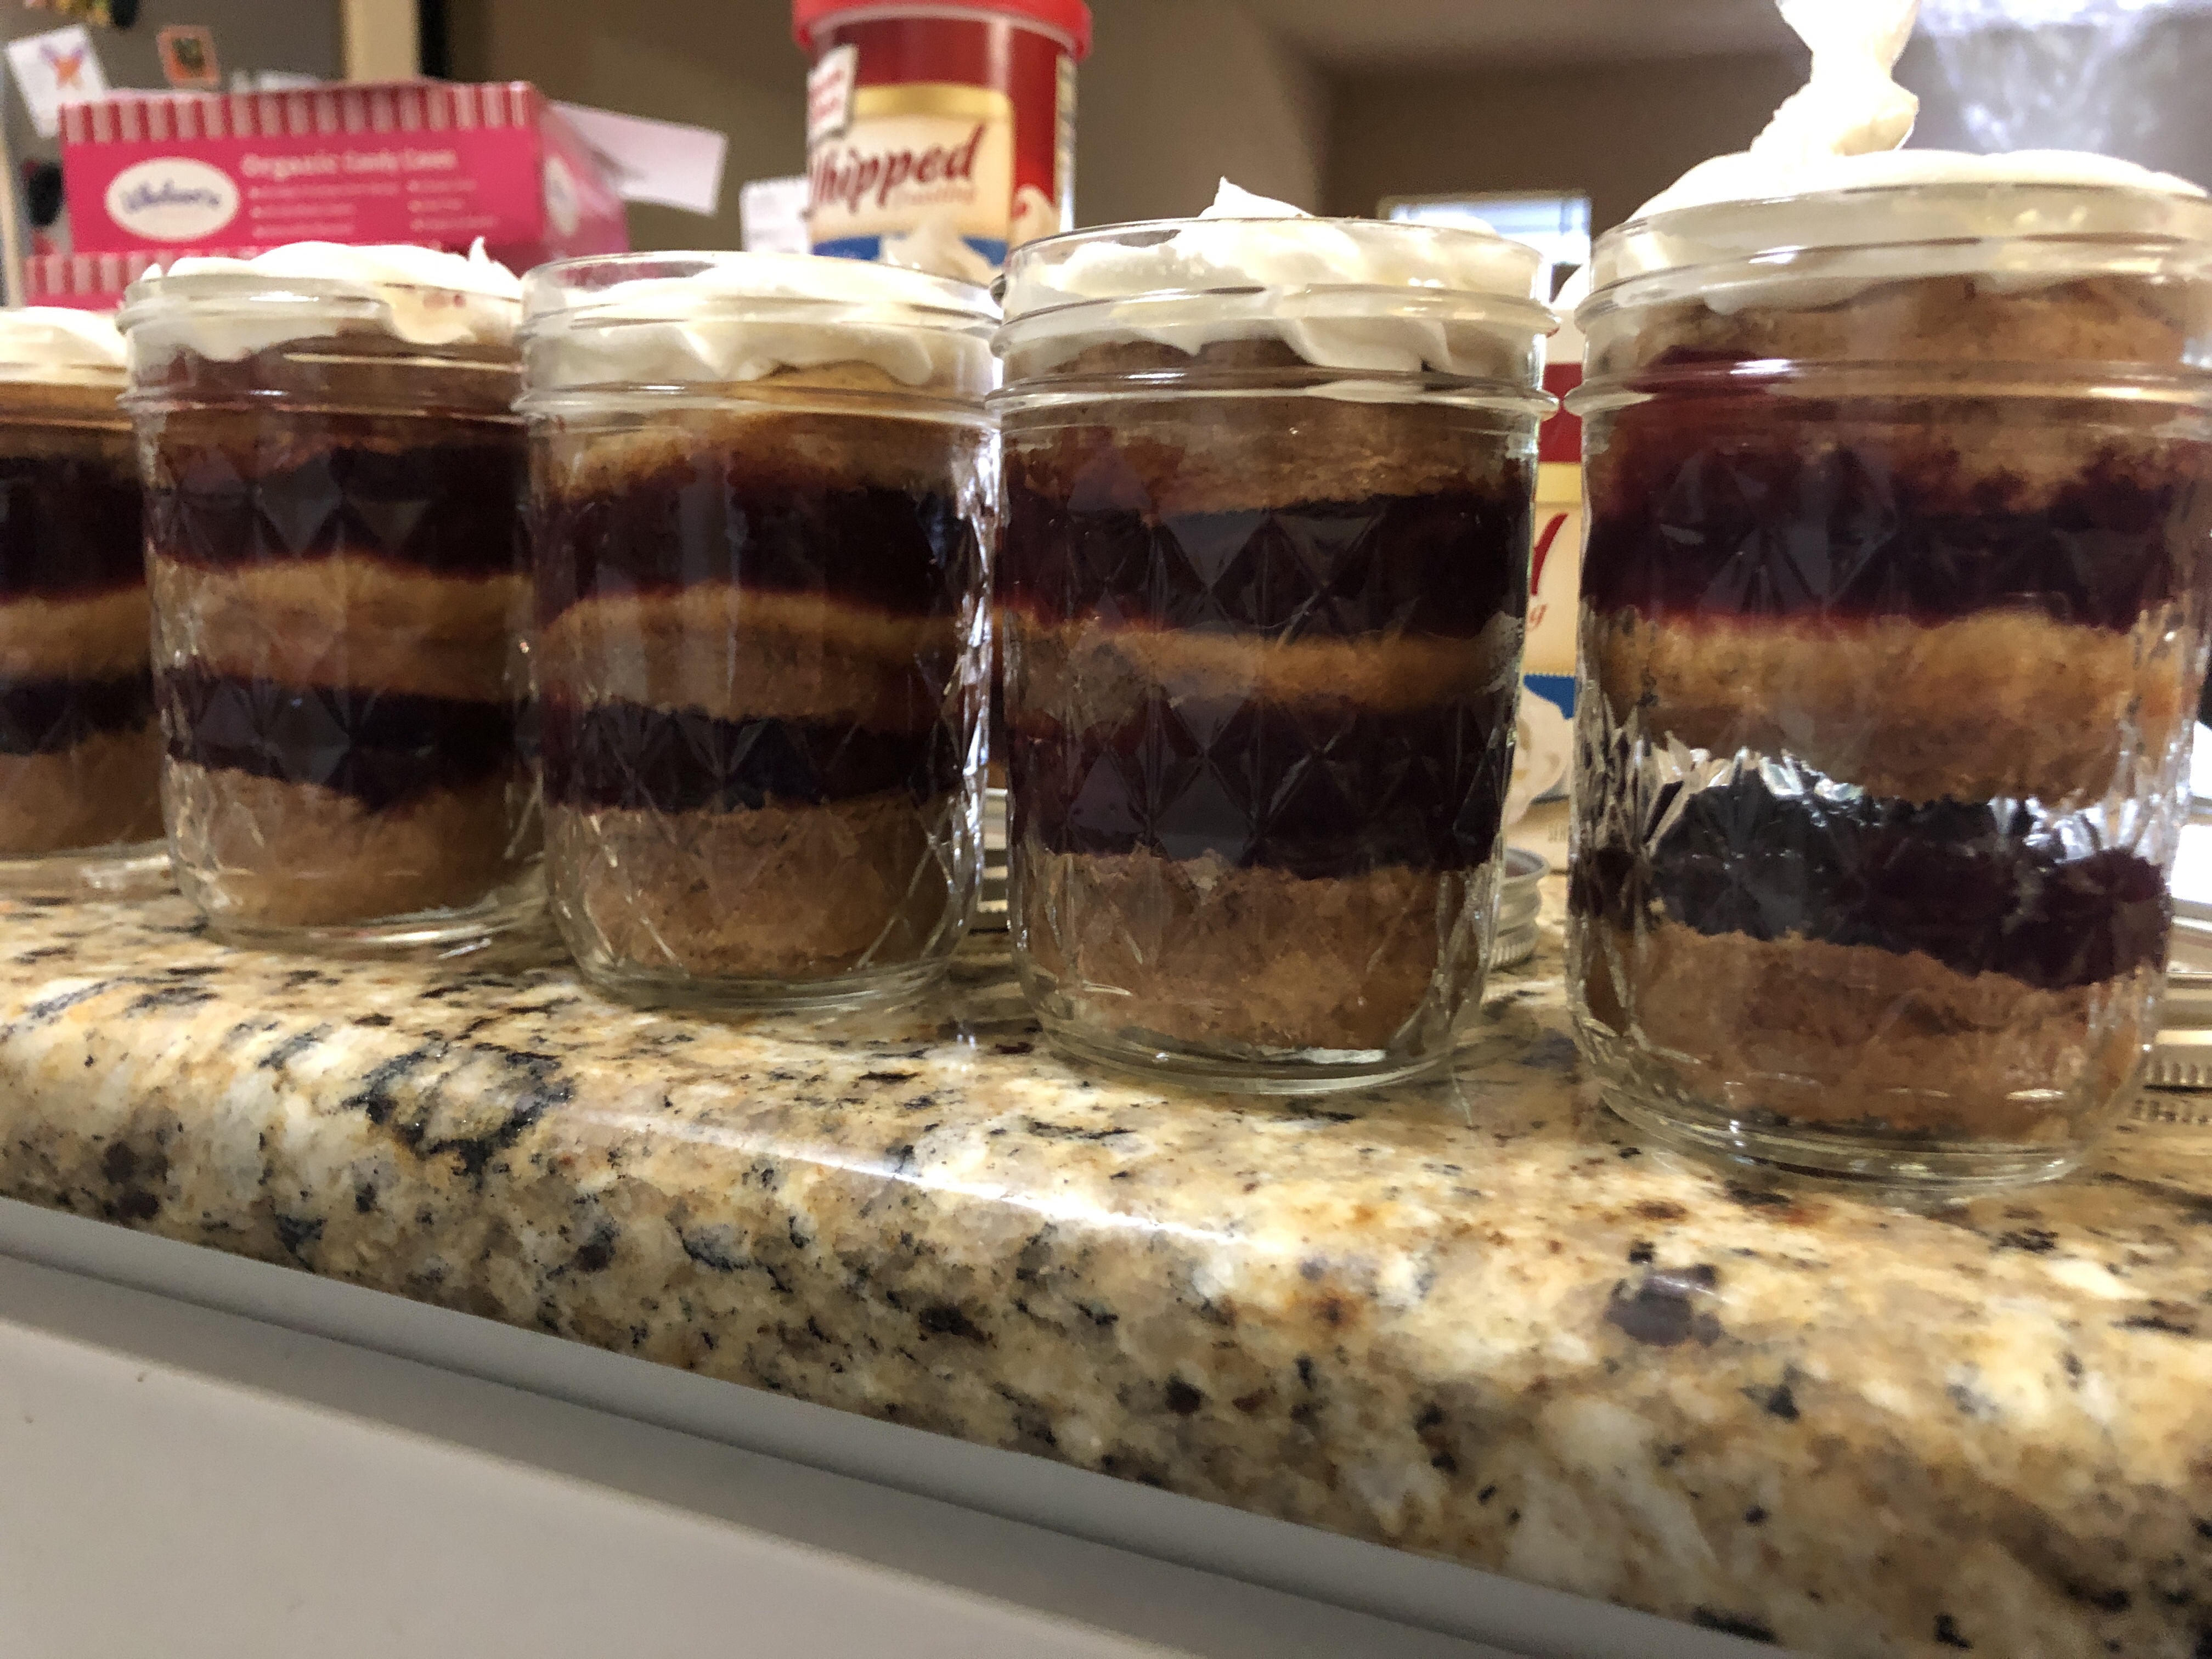
Cake in a Jar
This “cake” in a jar is so easy, you’ll be excited to use it again with different combinations.
Supplies Per 8 oz. Jar (multiply by number of jars needed)
- 1 1/2 cupcakes (flavor of your choice)
- container of frosting as needed (flavor of your choice)
- canned pie filling as needed (flavor of your choice)
STEP 1: Cut the cupcakes in half width-wise.
STEP 2: Place one half of each cupcake at the bottom of each jar.
STEP 3: Add 1 – 2 tablespoons of pie filling to each jar, just enough to cover the cupcake.
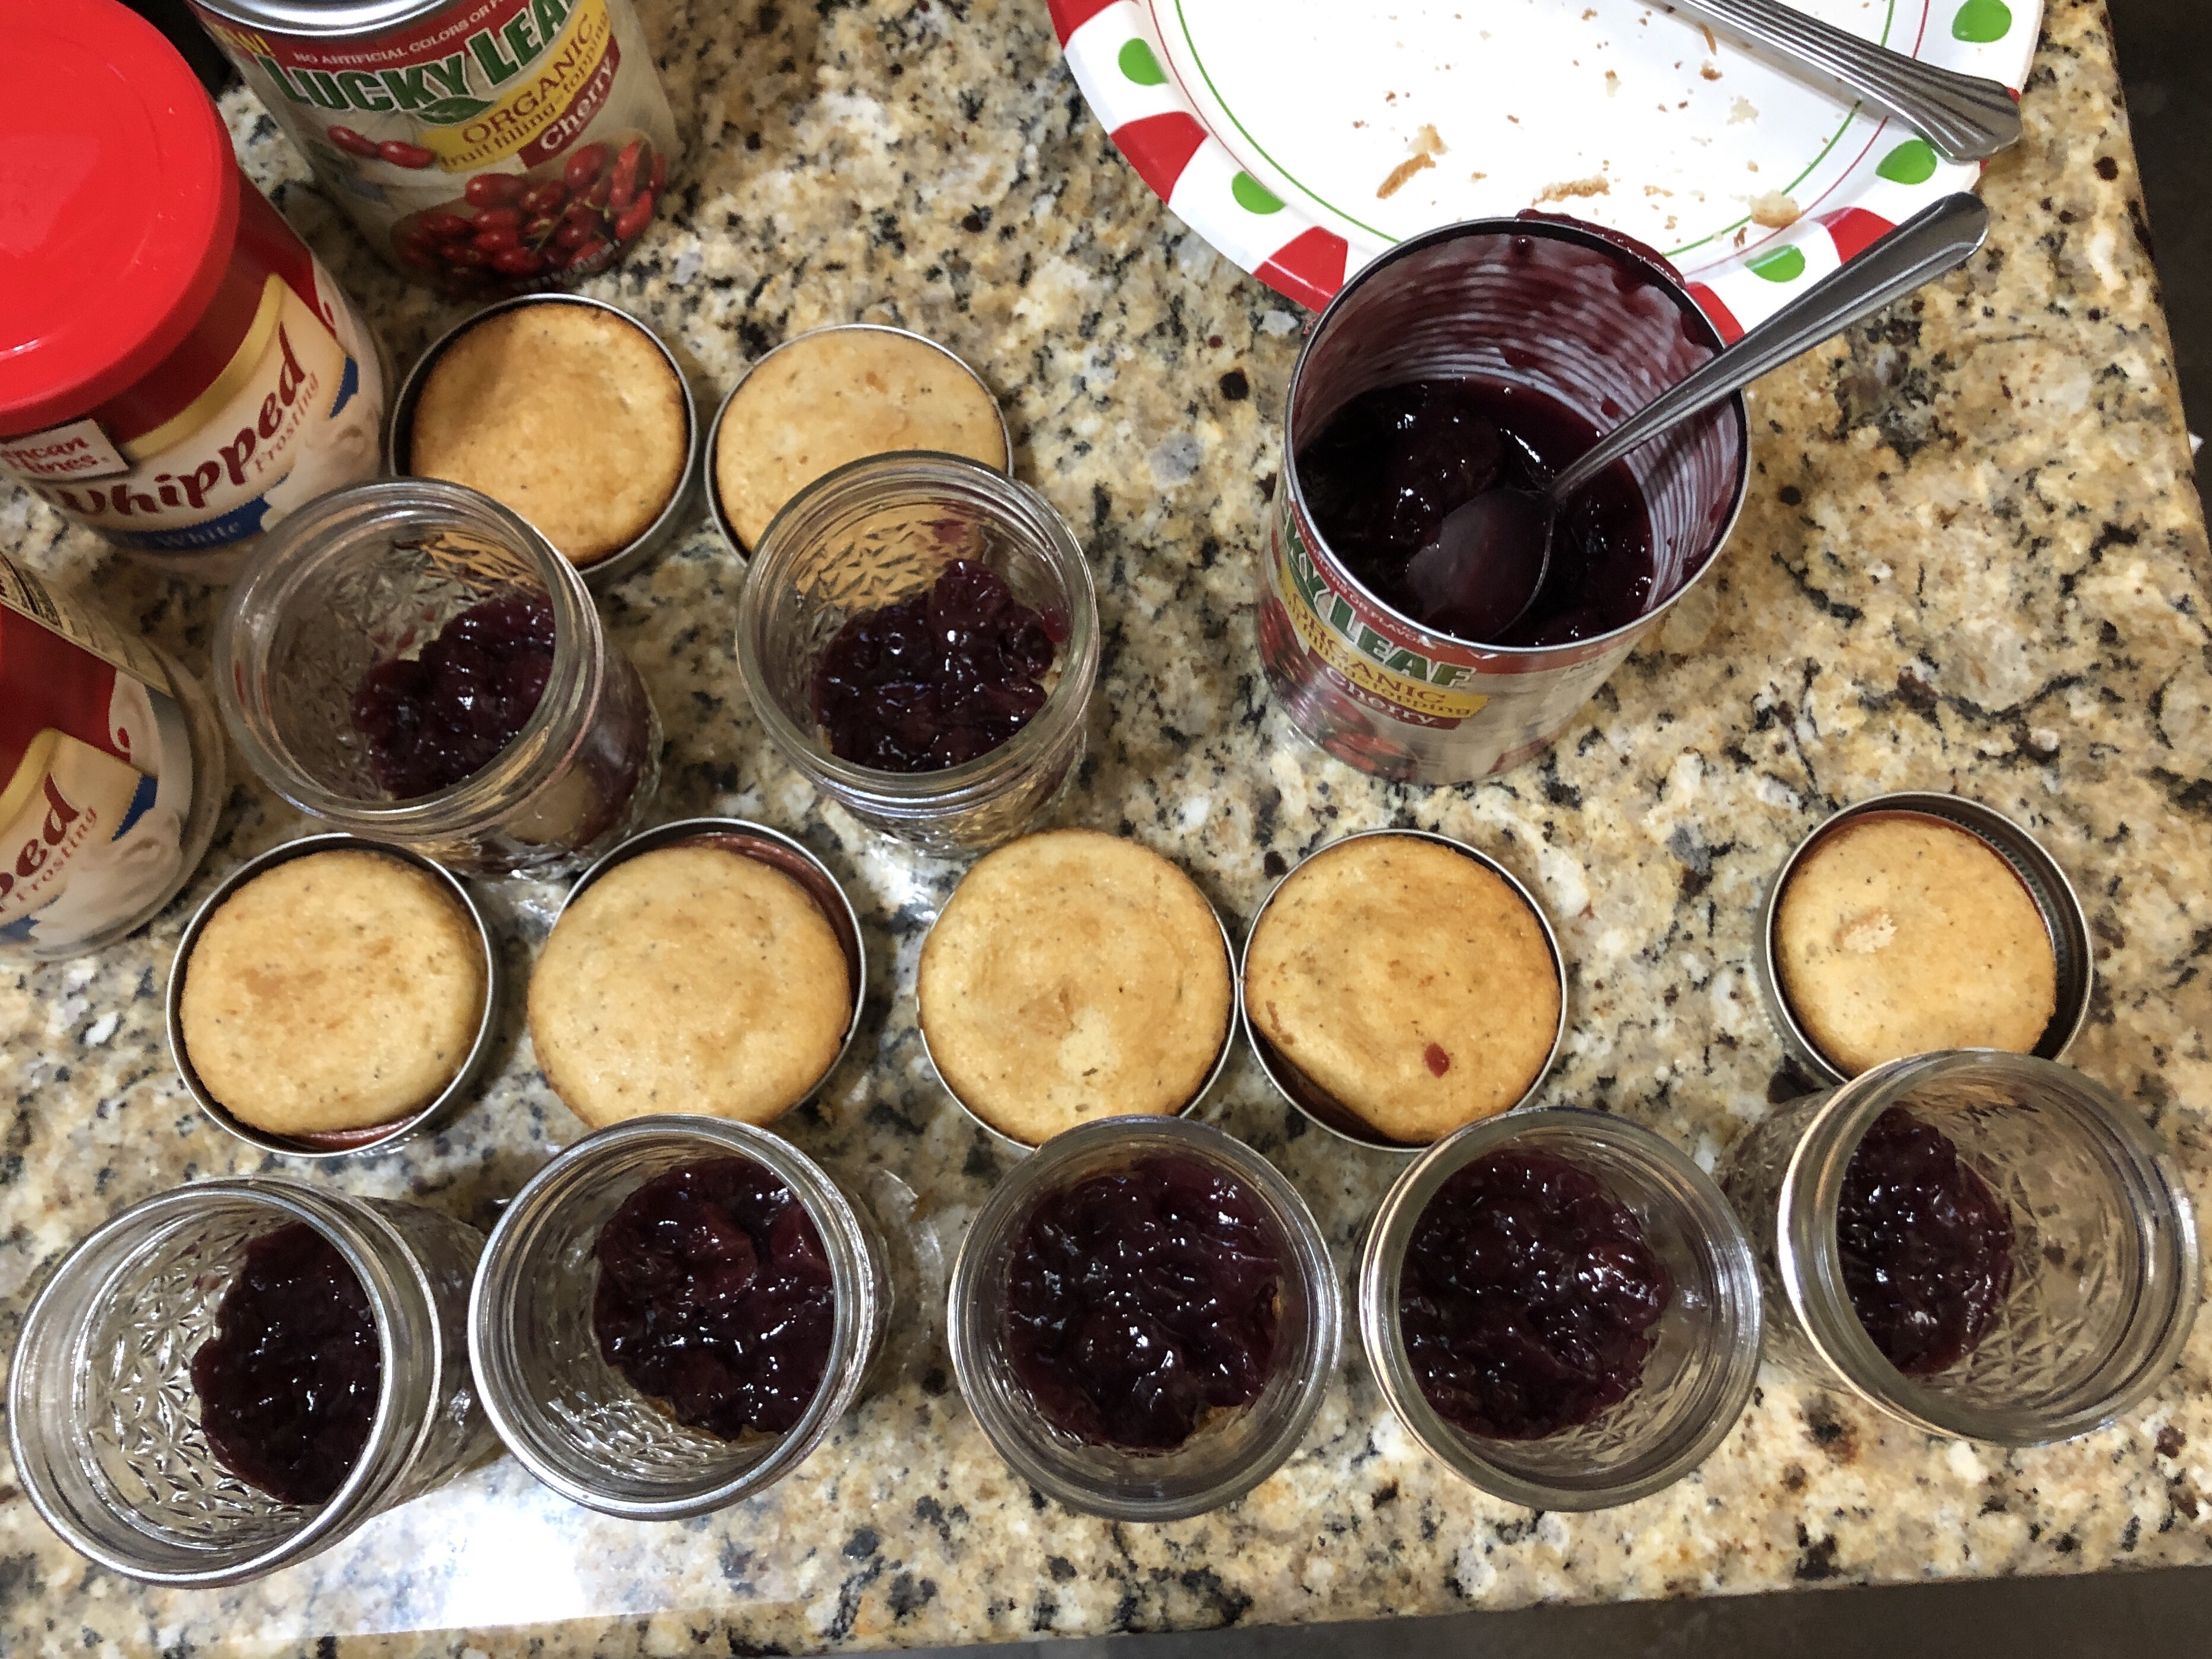
STEP 4: Repeat steps 2 and 3 until you are half an inch below the top. For us, that meant cupcake – pie filling – cupcake – pie filling – cupcake (hence the 1 1/2 cupcakes listed above in the supplies).
STEP 5: Top off your jar with a layer of frosting and seal the jars. All done!

Aren’t they cute? And delicious!
Assembling Your Cozy Kit
Once you have your items assembled, consider investing a little extra and putting them together in a reusable container instead of something that will just get thrown away. We love reusable gift containers, not just because of the positive environmental impact, but also because it’s a useful item that the recipient can continue to use. In this gift we found some fun red plastic boxes for the holidays that were marked down and fit everything perfectly!
And there you have it! We hope you and yours enjoy all the coziness contained in this kit, and you can expect more of these “kit” articles to be appearing here in the future. Feel free to share your experiences with making your own kits on our Facebook page. We’d love to hear how you customized yours!
Happy eventing!
